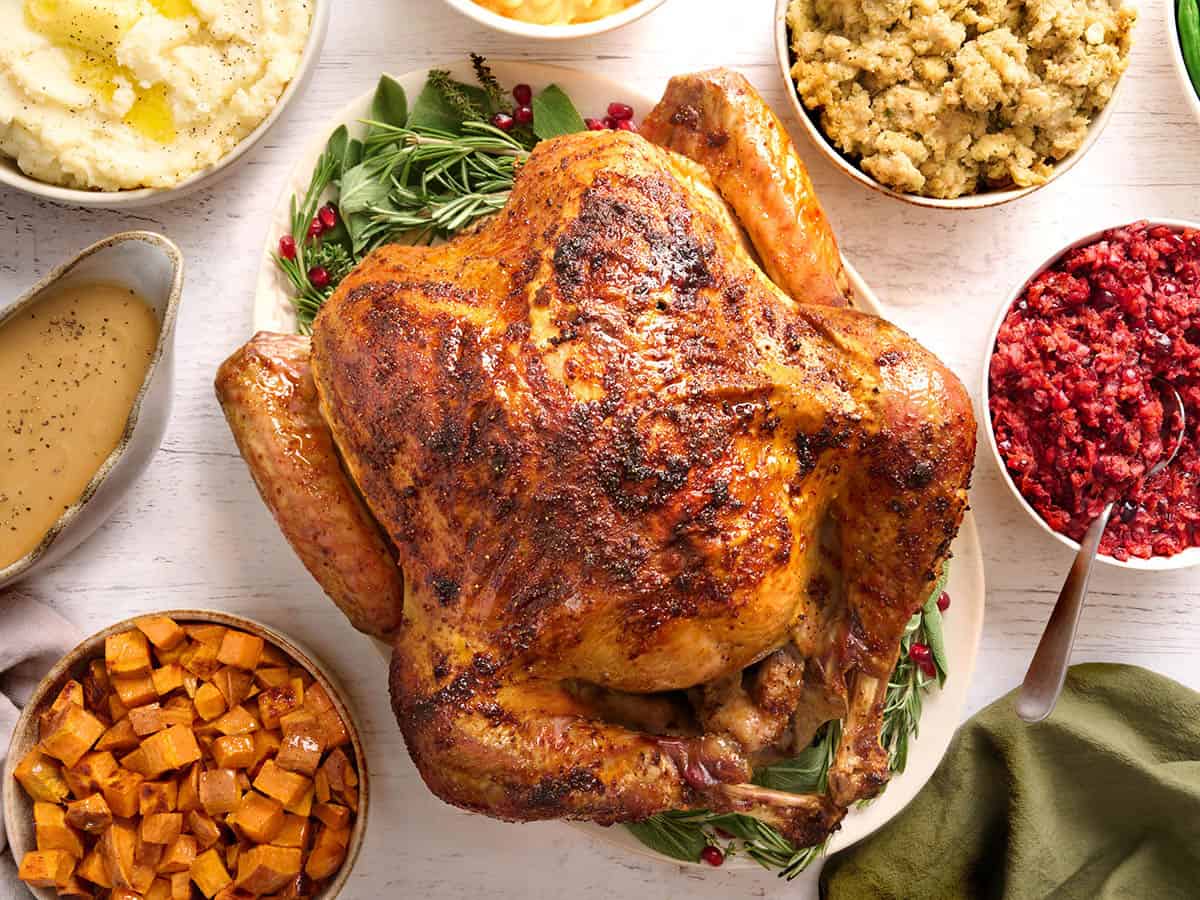

Roasting a whole turkey can be intimidating, but it really doesn’t have to be! That’s why I’ve put together this thoroughly tested (and tested, and tested again!) step-by-step guide to getting juicy, flavorful meat and beautifully golden, crispy skin without the guesswork. I’ll walk you through everything from safely thawing and prepping your Thanksgiving Turkey (including an optional dry brine) to roasting and carving, with plenty of helpful tips along the way. I’ve even included a printable Thanksgiving Day timetable you can stick on your fridge, so you can spend less time worrying about the turkey and more time enjoying the holiday!
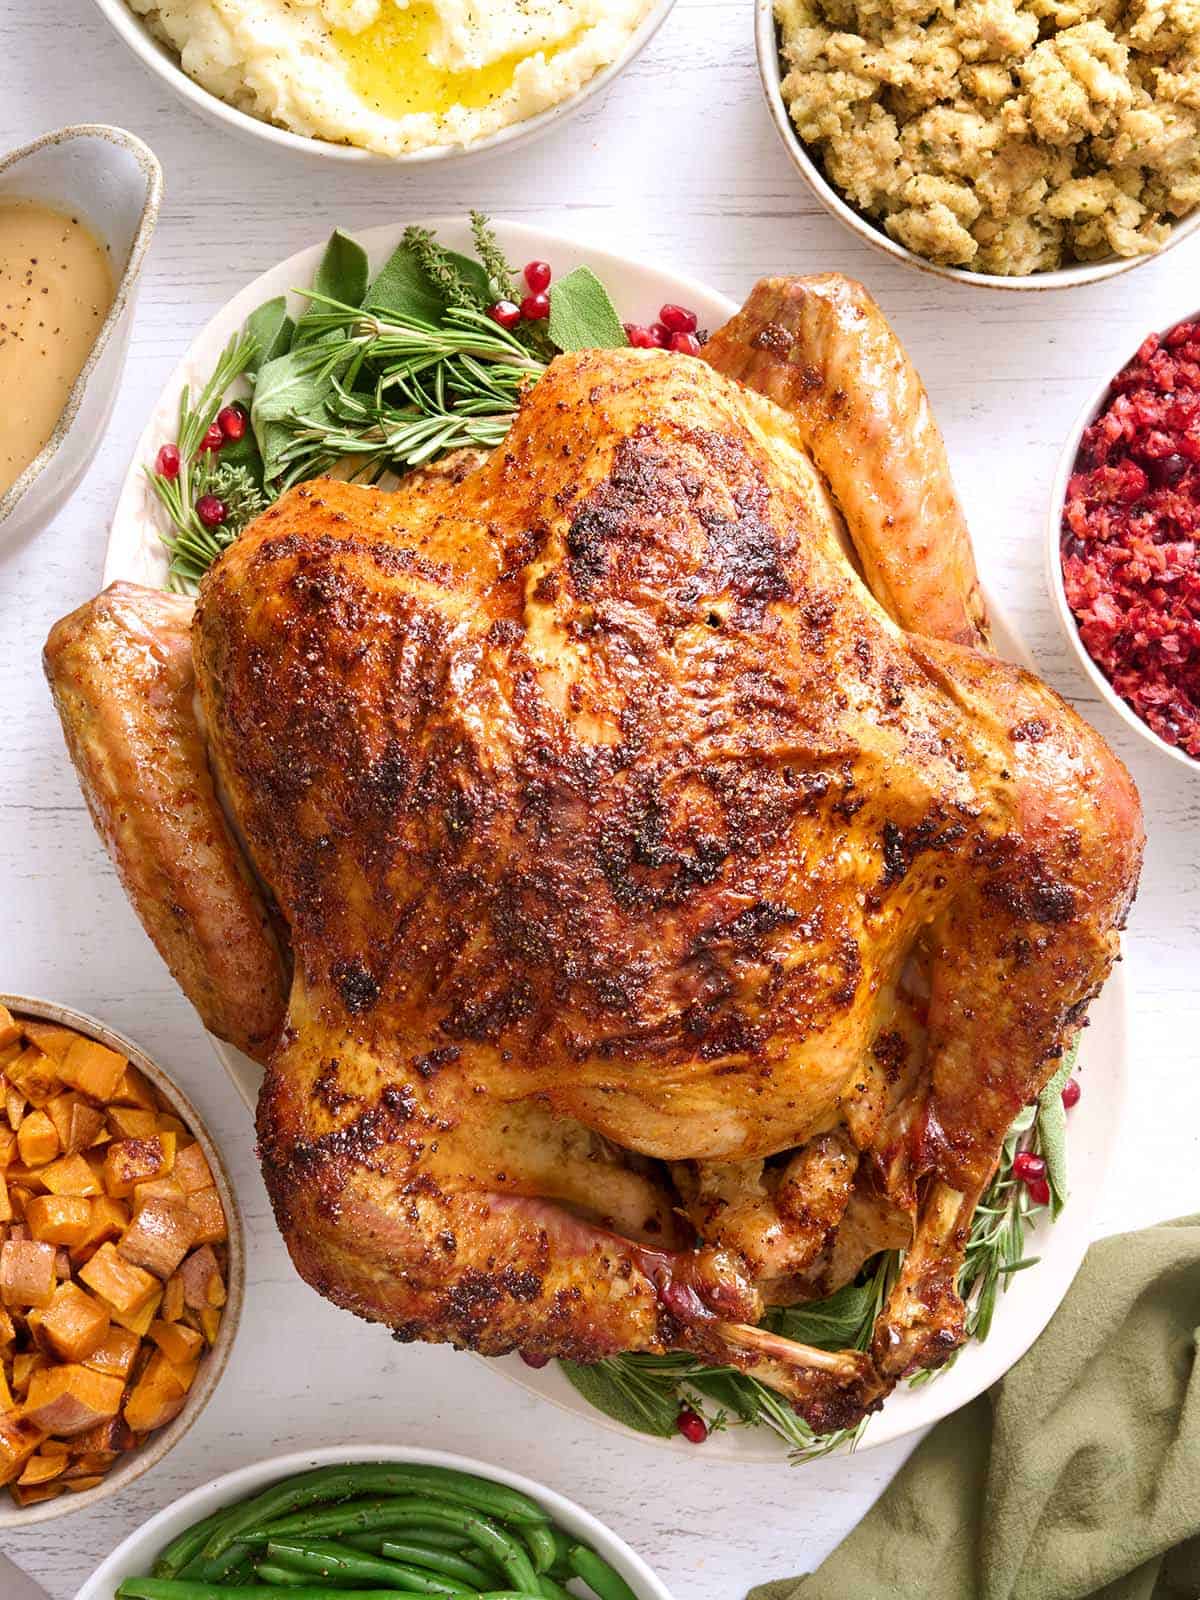
A Method You Can Count On
There is NO WAY I’d publish a recipe this important without making sure you have everything you need to get it right on the big day. I’ve worked through all the little details, from the seasoning to the roasting method, so you can feel confident making a turkey your whole family will love. Grandma likes dark meat? This method yields the juiciest, most flavorful thighs and drumsticks. Auntie Linda only eats white meat? The breast stays tender and juicy thanks to the garlicky herb butter tucked under the skin. And if your brothers and Dad love crispy skin, I can help you there! The optional dry brine and thin coating of seasoned oil give this roasted turkey a beautifully golden, crispy finish that the whole family will beg for.
But if there’s one thing I’ve learned through all my testing, it’s just how important a good meat thermometer is. The size of your turkey and even the pan you roast it in can affect the cooking time, so I always recommend checking the internal temperature rather than relying on the clock alone. Be sure to read my top tips and comprehensive FAQ section, too. I’ve covered everything you might need (including rescuing a turkey that’s still frozen on Thanksgiving morning!)
Recipe Success Tips
There’s a lot riding on this one bird, so naturally, there’s a lot of tips and guidance I need to cover, too. I recommend reading through this whole guide once (if not twice!) before getting started, including these tips and the FAQ section at the end.
- Season under AND over the skin. I tuck a garlicky herb compound butter (made from butter, garlic, dried herbs, and paprika) under the skin to keep the breast meat juicy and flavorful, then brush a micro-thin sheen of seasoned oil over the outside for beautifully crispy skin. Gently massage the butter through the skin to distribute it evenly, and dab the oil over the buttered areas, so you don’t accidentally move the butter out of place.
- Dry brine if you have the time. You don’t have to, but it makes a massive difference! Unlike a wet brine that waterlogs the skin, a dry brine uses salt to chemically restructure the meat proteins so they trap and hold onto their own natural juices while roasting. Plus, letting it sit uncovered in the fridge pulls surface moisture away, which is the absolute secret to getting that addictively crispy skin. Short on time? Just skip Steps 4 and 5 in my recipe below. The compound butter will still give your turkey plenty of flavor (promise!)
- Use a meat thermometer. Roasting times vary depending on your turkey’s size and the pan you use, so I’ve included weight-based guidelines in the recipe card below to help you plan ahead. I highly recommend an electronic probe thermometer so you can monitor the temperature without opening the oven.
- DON’T baste your turkey! Every time you open the oven door to baste, you let out heat, extending the cooking time. Pouring pan juices over the skin also adds moisture, which ruins all the effort you put into getting that skin bone-dry and shatteringly crisp. Trust the compound butter under the skin to do its job. If the breast or drumsticks start getting too dark before the turkey reaches temperature, tent them loosely with aluminum foil so they can finish cooking without overbrowning.
- Pull the turkey at 157-160°F and let carryover heat finish the cooking. Avoid touching bone with your thermometer, as this can skew the reading. As the turkey rests, the internal temperature continues rising, bringing it to a safe 165°F. Before carving, I always double-check three places with an instant-read thermometer: the thickest part of the breast, the innermost part of the thigh, and the innermost part of the wing. All three must reach at least 165°F before serving. If not, let it rest a little longer and check again.
- Save those pan juices, too! Don’t throw away the flavorful juices and drippings left in your roasting pan, either. Save them to make a delicious homemade turkey gravy.
- Short on time? Break down your turkey first. Cutting your turkey into individual pieces before roasting can help it cook much faster than leaving it whole. If you’re pressed for time on Thanksgiving Day, check out (also below!) for a helpful demonstration. You can use the same basic technique for turkey, but remember that cooking times will vary depending on the size of the pieces.
Budget-Saving Tips for Feeding a Smaller Crowd
A whole turkey is actually one of the most economical ways to feed your family this Thanksgiving. I recently spotted frozen whole turkeys at Walmart for just $0.84 per pound, which is an incredible deal. If you have the time and freezer space, all that extra meat can be put to good use in soups, sandwiches, casseroles, and more over the following days (I’ve shared some leftover ideas below!).

However, if you’re only feeding a few people, don’t want a fridge full of leftovers, or simply want to skip roasting a whole bird, you can still enjoy those same delicious holiday flavors with our roasted turkey breast or swap to turkey drumsticks instead.
You can use the exact same aromatics, butter-under-the-skin technique, and dry-spice profile as my whole turkey recipe below, just adapted for dark meat turkey drumsticks!
Check out our baked chicken drumsticks recipe for the full step-by-step technique, then make these easy adjustments for turkey:
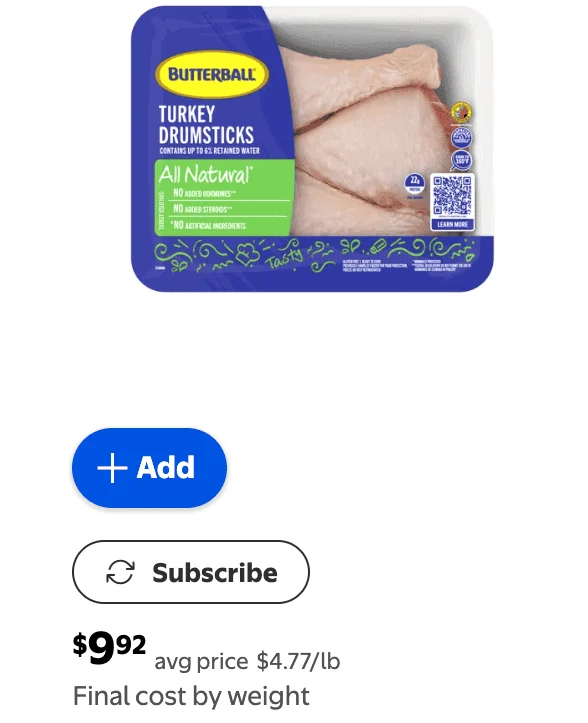
- Spices and fats: Keep the ingredients identical! Use the same compound butter tucked under the skin and the seasoning oil blend (canola oil, black pepper, garlic powder, onion powder, paprika, and ground mustard) brushed over the exterior.
- Temperature and time: Because turkey drumsticks are significantly larger than chicken legs, roast them at 350°F for roughly 1 hour-1 hour 15 minutes, flipping them halfway through.
- Target temperature: Use your digital thermometer and pull them when the thickest part hits 165°F (or ideally 175°F so all that collagen in the dark meat melts into tender, succulent meat).
How many turkey legs do I need?
- 1 turkey leg per adult (or 1 leg per big eater).
- 1 turkey leg per 2 young children (or smaller appetites).
What to Serve with Roasted Turkey
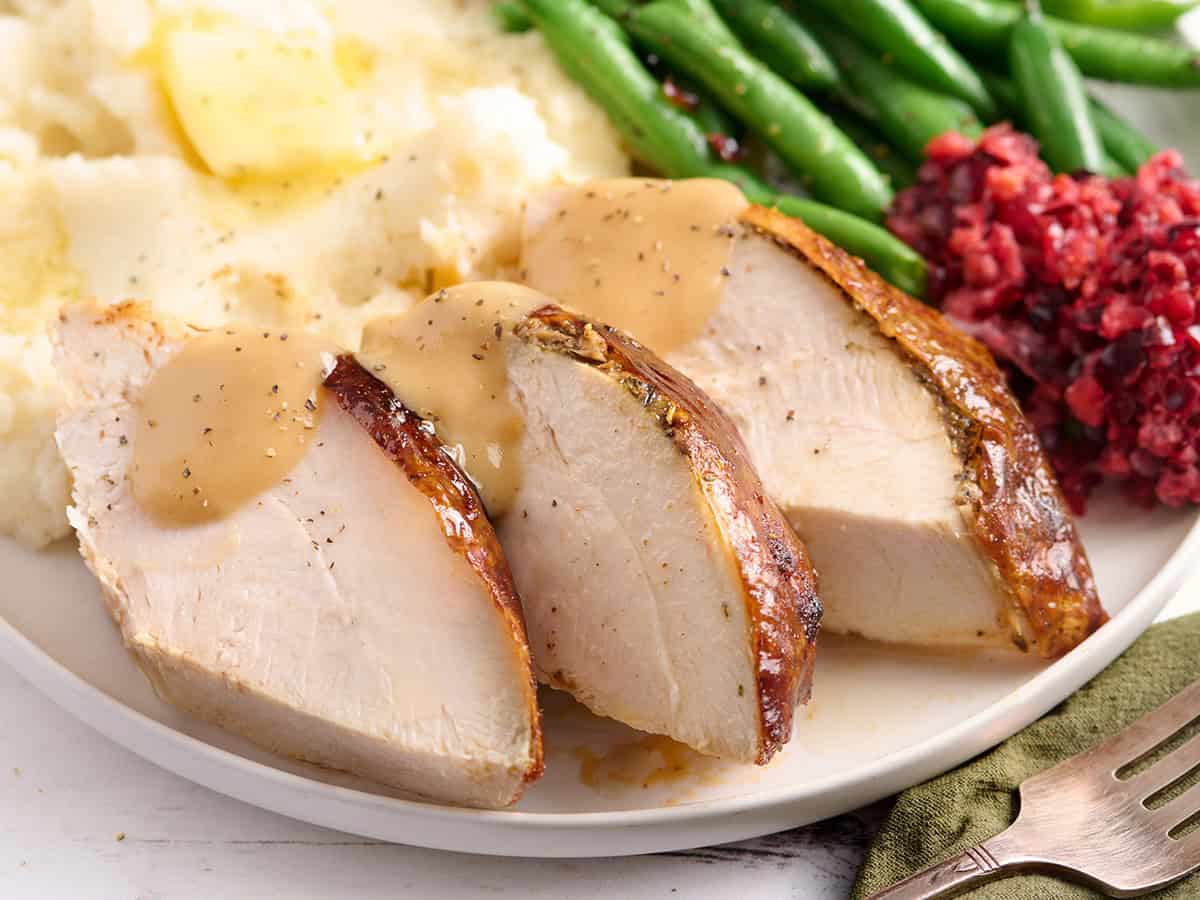
Roasted turkey might be the main event, but it’s nothing without all the classic Thanksgiving fixings. Creamy mashed potatoes and plenty of turkey gravy are a must, especially for serving alongside the leaner white meat. Cranberry sauce (or my cranberry relish for something a little fresher) helps balance all those rich flavors, while sausage stuffing brings plenty of herbs and comforting holiday flavor to the plate. I’d also add a side of green beans, for something easy and colorful, and a classic sweet potato casserole for a little sweetness. Of course, there’s always room for more family favorites!
To make Thanksgiving Day easier, I like to make the cranberry sauce ahead of time and get any sides (like stuffing and sweet potato casserole) prepped in advance. The green beans and gravy can be made while the turkey rests. For more affordable holiday dishes and help planning your menu, check out my recent holiday guide.
Got Leftovers?
Once you’ve removed the meat from the bones, refrigerate any leftovers in shallow, airtight containers within 2 hours. It’ll keep in the fridge for 3-4 days, or you can freeze it in portions for up to 3 months. Reheat leftovers in the microwave, skillet, or oven until they reach 165°F.
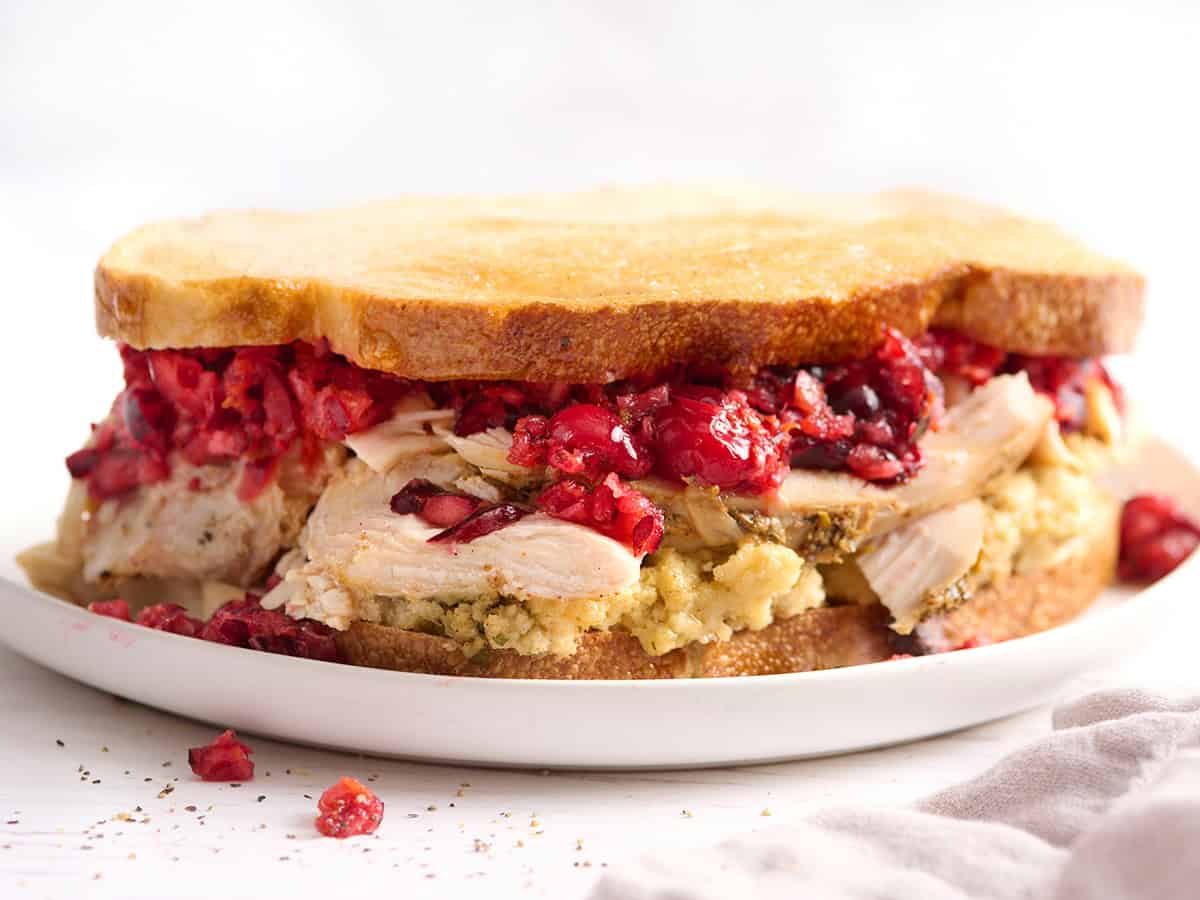
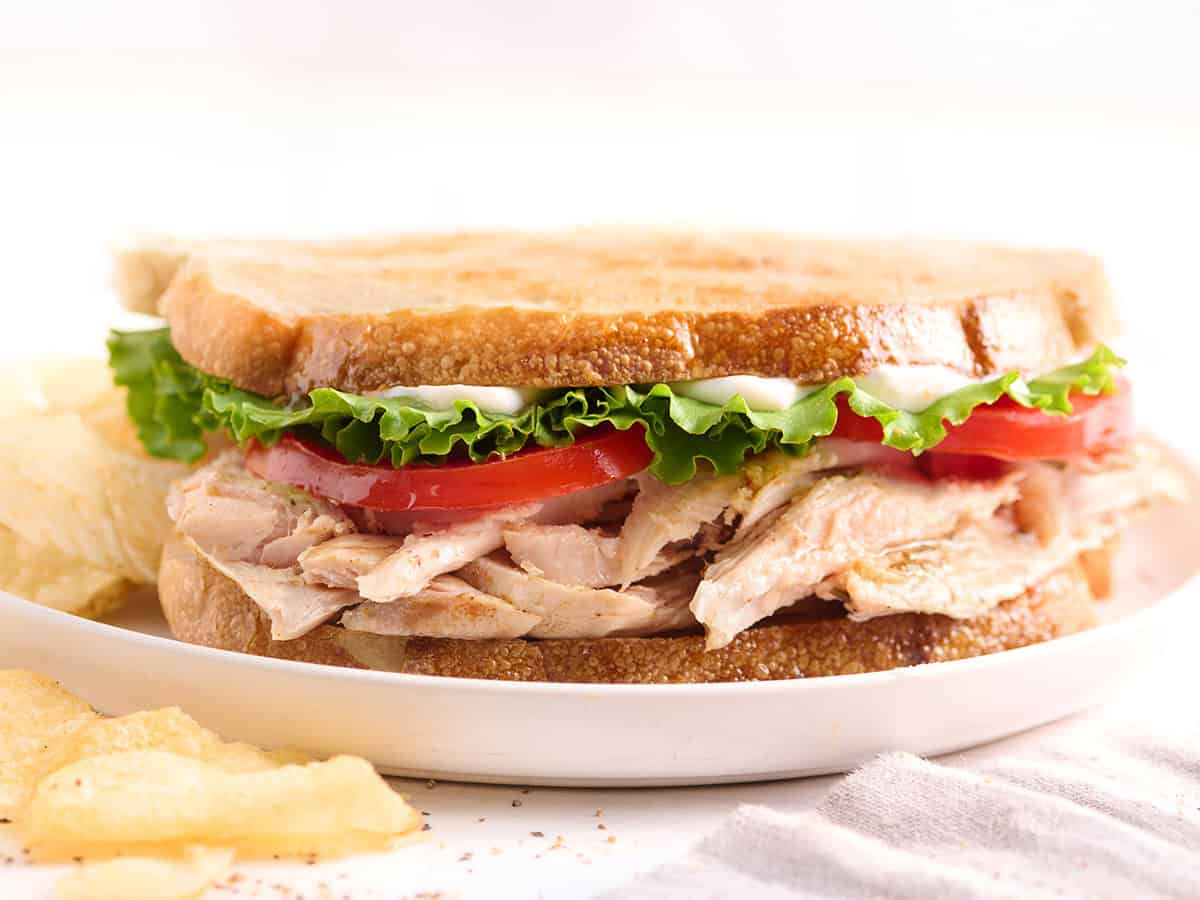
However, leftover turkey is also delicious cold! My family loves a good turkey sandwich with leftover cranberry sauce and stuffing, or you can tuck it between toasted bread with a little mayo and whatever salad ingredients you’ve got on hand. It’s also perfect for making meals over the next few days. Use it to make a turkey pot pie, swap it for shredded chicken in your favorite recipes, or make a big pot of turkey noodle soup (recipe coming soon!).
Thanksgiving Turkey Recipe
Equipment
- Electronic Probe Thermometer
- Large Baking Sheet with Rack
- Gloves
Ingredients
- 12-14 lbs. whole turkey with giblets, (mine was 13.72lbs) $11.52*
Optional Dry Brine
- 1 Tbsp + 1 tsp Morton’s Kosher Salt see important salt notes below!! $0.05**
Compound Butter (Under the Skin)
- 2 sticks unsalted butter room temperature, (1 cup) $1.48
- 4 garlic cloves pressed or finely minced, (about 1 Tbsp) $0.24
- ½ tsp ground black pepper $0.09
- 1½ tsp dried rosemary $0.18
- 1 tsp dried thyme $0.12
- ½ tsp rubbed sage $0.07
- ½ tsp paprika $0.02
Seasoning Oil (On Top of the Turkey)
- 1½ Tbsp canola oil $0.06***
- ½ tsp ground black pepper $0.09
- 1 tsp garlic powder $0.05
- 1 tsp onion powder $0.05
- ½ tsp paprika $0.02
- ¼ tsp ground mustard powder $0.03
Instructions
- Safely Thaw (3 to 4 Days Ahead): Make sure to start defrosting your whole turkey in the refrigerator, unopened, on a rimmed tray at least 3 to 4 full days before the day you plan to eat it. Start thawing on Sunday or Monday morning if you plan to dry-brine on Wednesday.
- Unwrap & Trim: Once thawed, unwrap the turkey and remove the neck and giblets from the cavities. Using kitchen shears, trim away the excess neck skin and tail fat. Pour out any pooled juices from the cavity.
- Pat Bone-Dry: Thoroughly dab the entire turkey inside and out with clean paper towels until completely dry. You should also dab underneath the skin of the turkey dry; the space between the breast meat and the skin. Transfer the bird to a wire rack set inside your large baking sheet or roasting pan. Tuck the turkey’s wings behind it’s back in preparation for when it goes in the oven (this keeps the wings from burning!).
- (If you're planning to dry brine your turkey, read on. If you are skipping the dry brine, go to Step 6!) Apply the Dry Brine: Measure out 1 Tbsp + 1 tsp of Morton’s Kosher Salt (using Morton's ensures accurate salinity). Rub ½ tsp inside the cavity, ½ tsp under the breast skin directly onto the meat, and the remaining salt evenly over the exterior skin.
- Air-Chill Uncovered (optional, if dry brining): Make sure the skin is covering the breast meat again and place the bird back in your refrigerator uncovered for 12-24 hours (overnight is ideal). This dehydrates the outer skin so it bakes up nice and crisp.
- Mix Compound Butter: Combine the room temperature/softened unsalted butter, pressed garlic, black pepper, rosemary, thyme, sage, and paprika in a bowl using a fork until mostly smooth.
- Mix Seasoning Oil: In a small cup, stir together the canola oil, black pepper, garlic powder, onion powder, paprika, and ground mustard to create your "seasoning salt" exterior paste.
- Apply Compound Butter Under the Skin: Take the turkey out 30 minutes before roasting to take the chill off. Gently slide your fingers under the breast and thigh skin to loosen pockets. Divide your compound butter in half, pushing half deep under the left breast/thigh and half under the right. Then, massage gently through the skin with clean, dry hands from the outside (on top of the skin) to distribute.
- Brush Exterior with Oil: Using a pastry brush, gently apply a micro-thin sheen of the seasoning oil mixture all over the outside skin (drumsticks, wings, and exterior). Dab gently over the buttered areas so you don't displace the butter.
- Insert the probe thermometer into the thickest part of the turkey breast that will be facing the oven door. This way, the cable will be closest to the door and the screen showing you the temperature can neatly rest on a countertop. I highly recommend you use a probe thermometer to avoid a dry turkey breast!
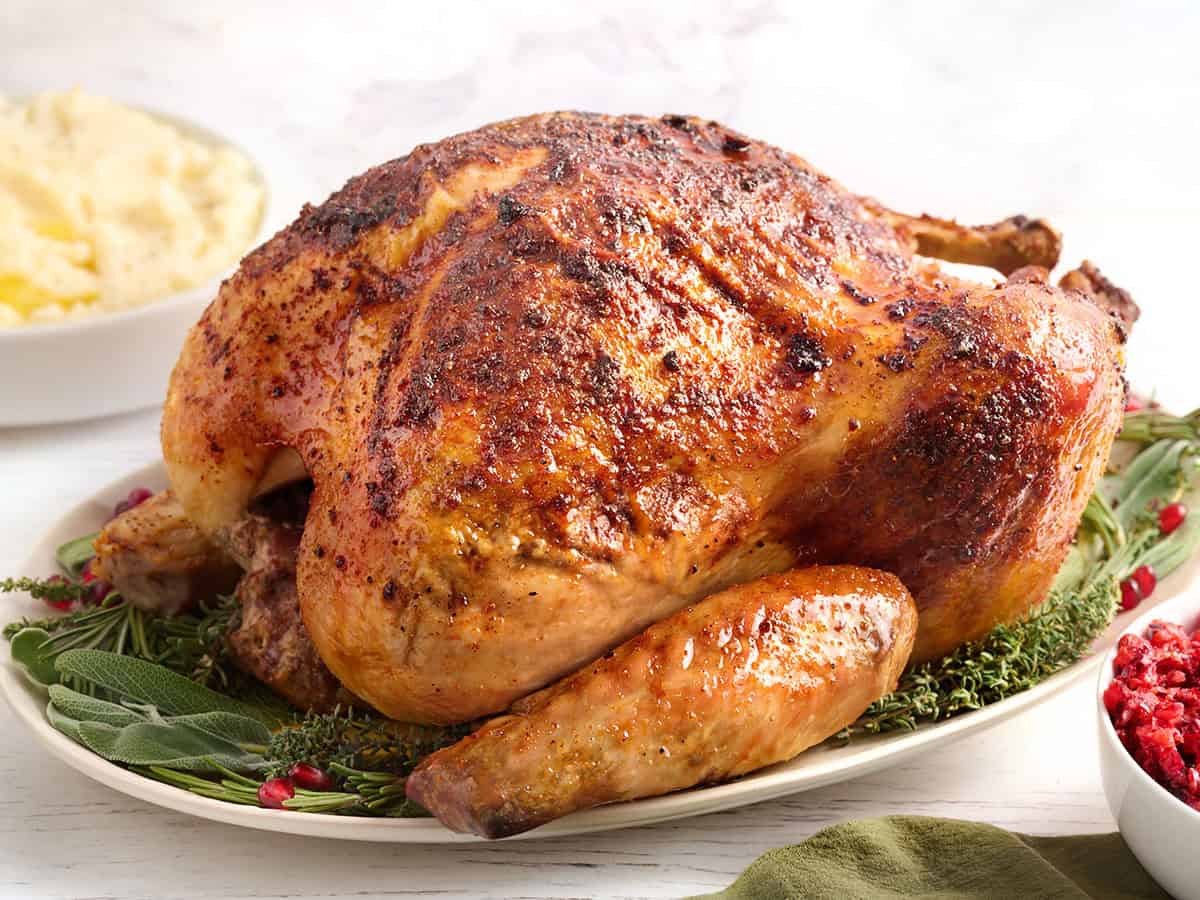
- Roast to Perfection: Roast your unstuffed bird at 350°F for roughly 2-2 ½ hours for a sheet pan with wire rack, or 2½-3 hours if using a high-sided roasting pan. Pull the bird when an instant-read thermometer inserted into the thickest part of the breast reads 157°F-160°F. The breast will hit 165°F via carryover heat while resting on the counter, rather than needing to hit 165°F inside the oven. Let the turkey rest uncovered for 30-45 minutes before carving to let internal juices settle as carryover heat finishes bringing it to temperature.
See how we calculate recipe costs here.
Notes
- For a 12 lb Turkey: 2 hours 45 minutes to 3 hours
(begin temping the turkey at the 2 hour mark to avoid overcooking) - For a 13 lb Turkey: 3 hours to 3 hours 15 minutes
(begin temping the turkey at the 2 hour 15 minute mark to avoid overcooking) - For a 14 lb Turkey: 3 hours 15 minutes to 3 hours 30 minutes
(begin temping the turkey at the 2 hour, 30 minute hour mark to avoid overcooking)
- Thickest part of the breast (I leave the probe thermometer in as it rests so I can see when it hits 165°F)
- Innermost part of the thigh
- Innermost part of the wing
- For a 12 lb Turkey: 2 Tablespoons (6 tsp total)
- For a 13 lb Turkey: 2 Tbsp + ½ tsp (6.5 tsp total)
- For a 14 lb Turkey: 2 Tbsp + 1 tsp (7 tsp total)
Nutrition
how to make Thanksgiving Turkey step-by-step photos
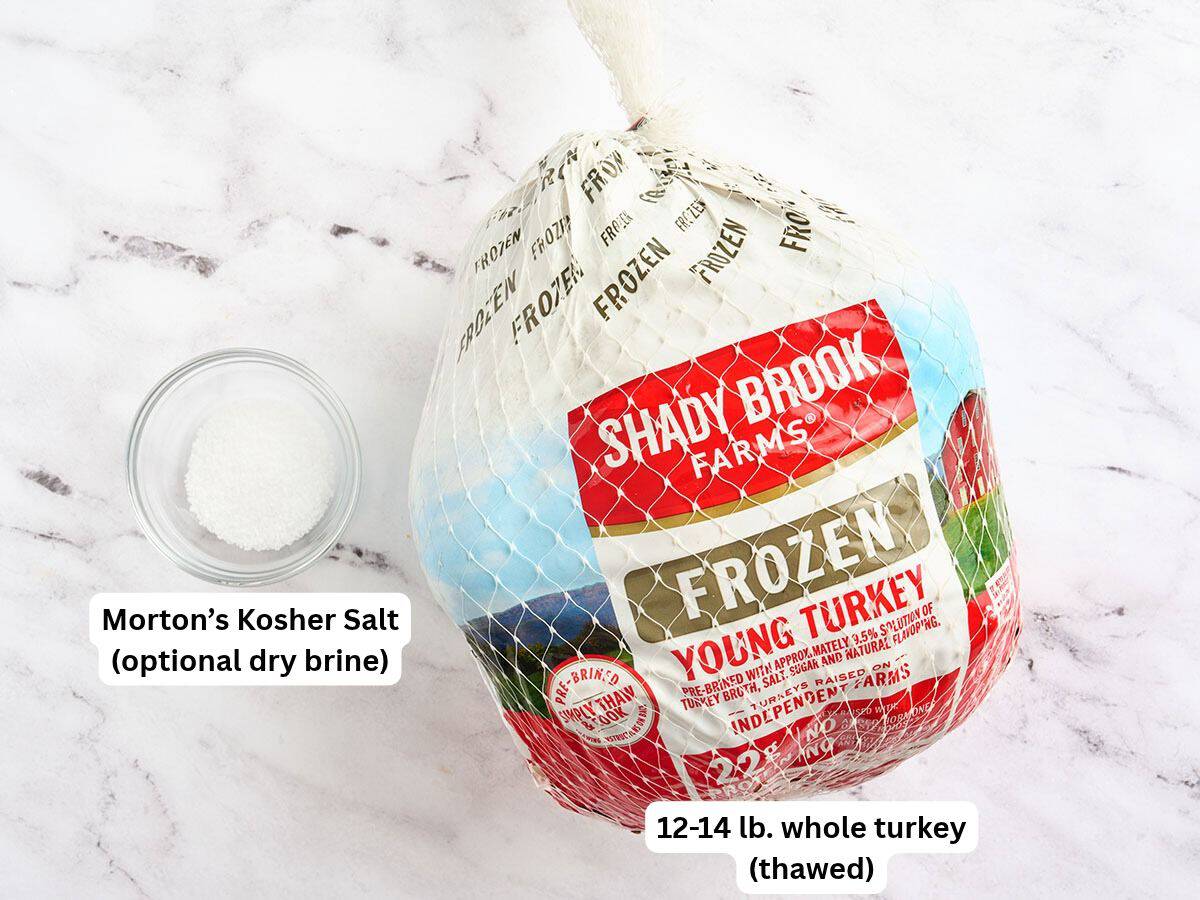
Gather your turkey ingredients: This recipe is designed for a 12-14 lb whole turkey. Mine weighed 13.72 lbs. If you’re planning to dry brine your turkey, you’ll also need 1 Tbsp + 1 tsp Morton’s kosher salt. Allow 3-4 days for your turkey to thaw in the refrigerator. Keep it unopened on a rimmed tray to catch any drips. If you’re dry brining, count back from the day you plan to brine.
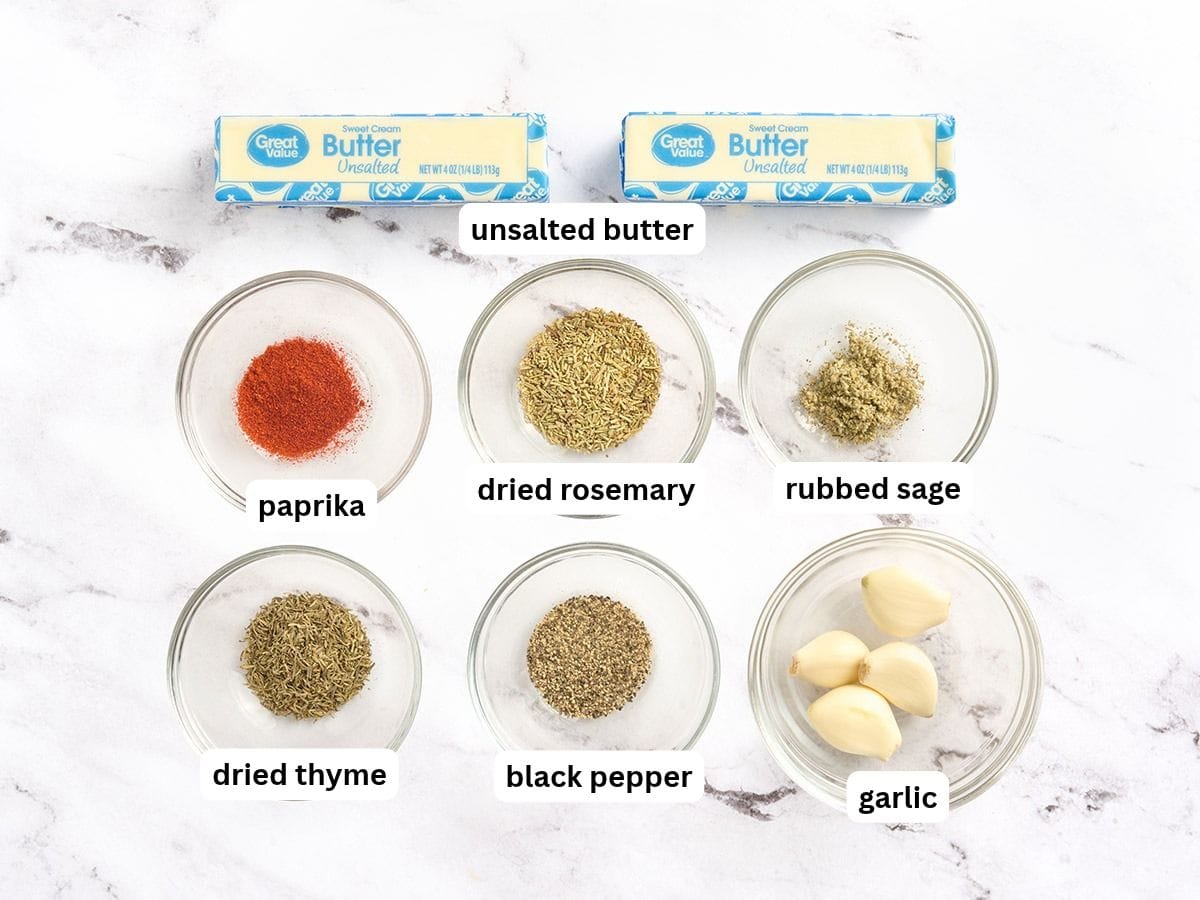
Gather your compound butter ingredients: You’ll need 2 sticks (1 cup) unsalted butter, 4 cloves garlic (pressed or finely minced, about 1 Tbsp), ½ tsp ground black pepper, 1½ tsp dried rosemary, 1 tsp dried thyme, ½ tsp rubbed sage, and ½ tsp paprika. Make sure your butter is softened to room temperature so it’s easy to combine with the seasonings and spread underneath the turkey skin.
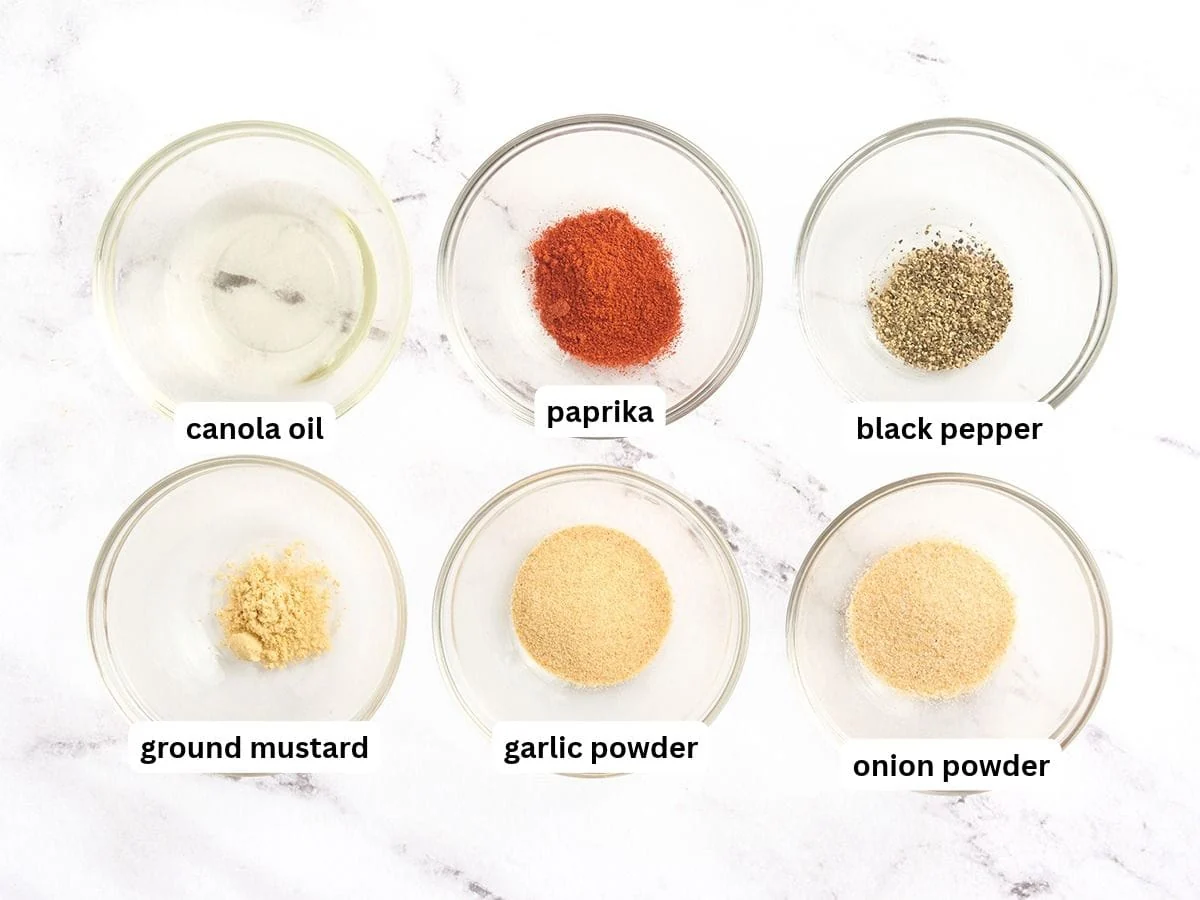
Gather your seasoning oil ingredients: You’ll need 1½ Tbsp canola oil, ½ tsp ground black pepper, 1 tsp garlic powder, 1 tsp onion powder, ½ tsp paprika, and ¼ tsp ground mustard. This mixture goes on the outside of the turkey to help create the best crispy skin.
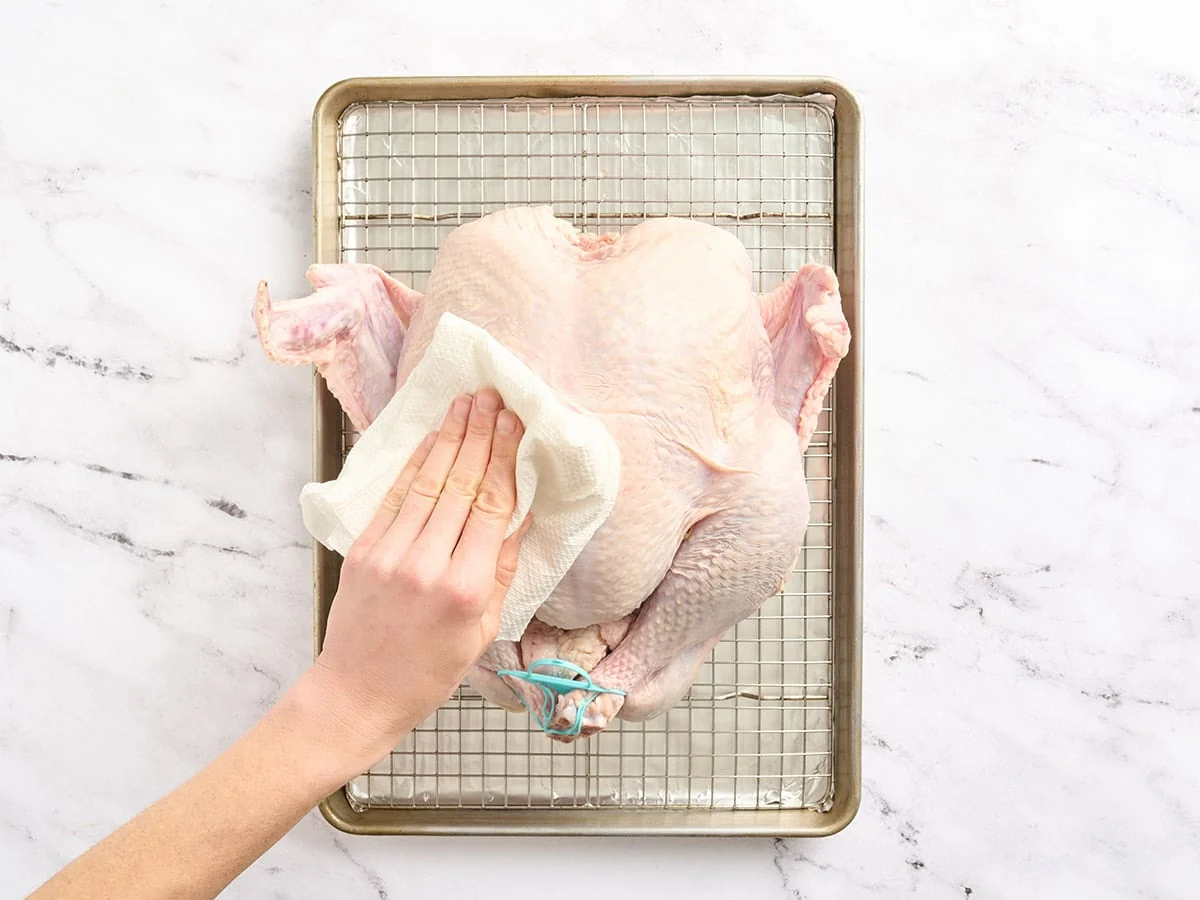
Unwrap, trim, and pat dry: Once your turkey is completely thawed, remove the neck and giblets from the cavities. Use kitchen shears to trim away any excess neck skin and tail fat, then pour out any pooled juices. Pat the turkey thoroughly dry inside and out with clean paper towels. Place it breast-side up on a wire rack set inside a large rimmed baking sheet or roasting pan.
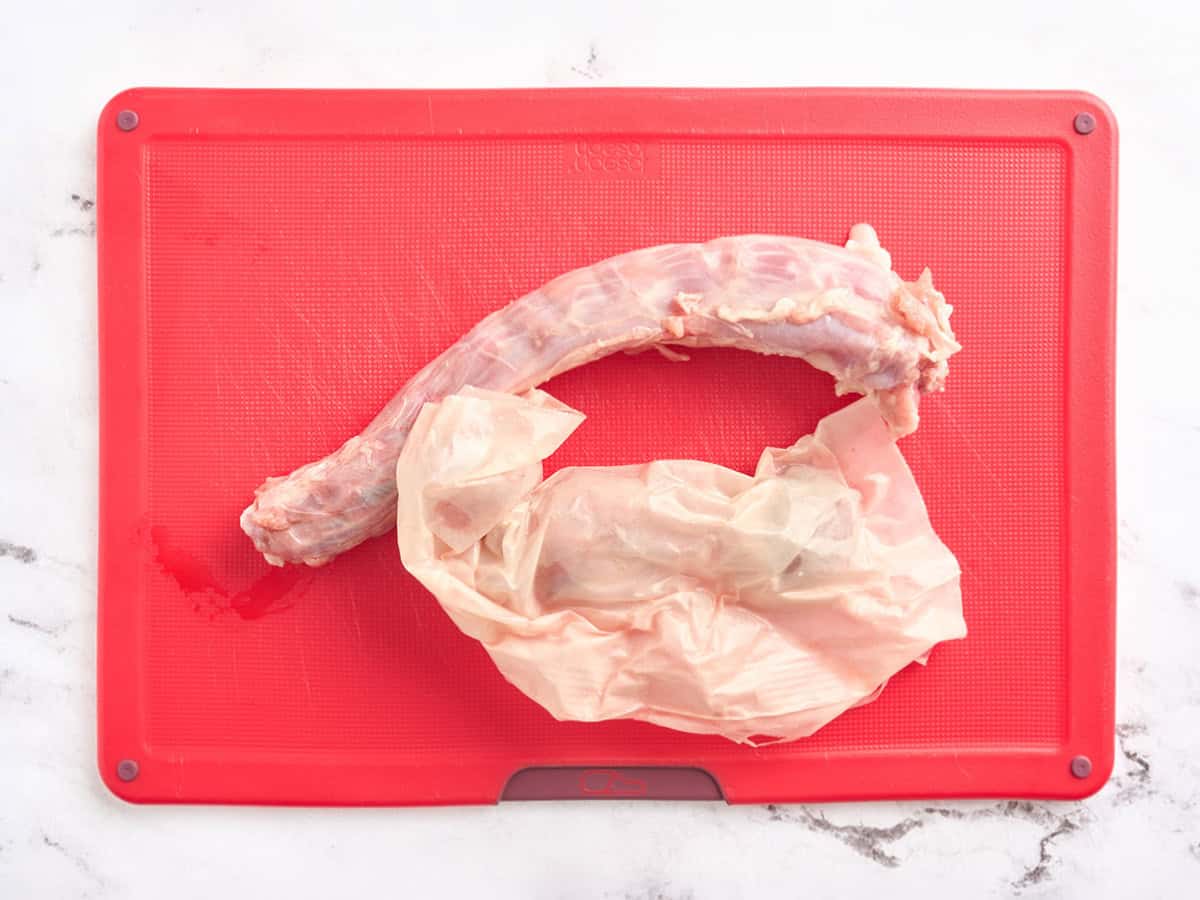
This is what the neck and giblets bag looks like. You can throw them away, or save them for stock (see the ‘Don’t Waste a Thing!’ section below).
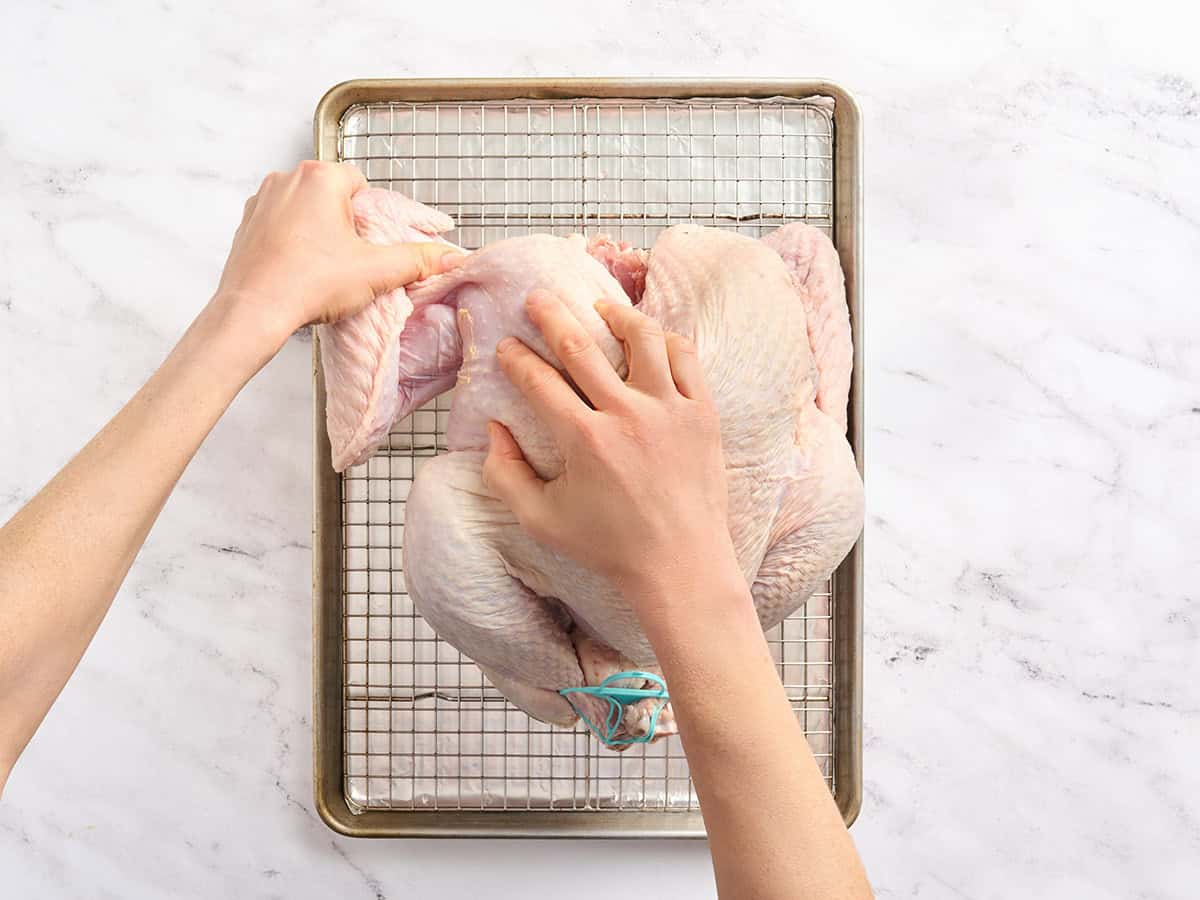
Tuck the wings underneath: Fold the turkey’s wings back behind its body so the tips are tucked underneath. This helps protect them from burning while the turkey roasts.
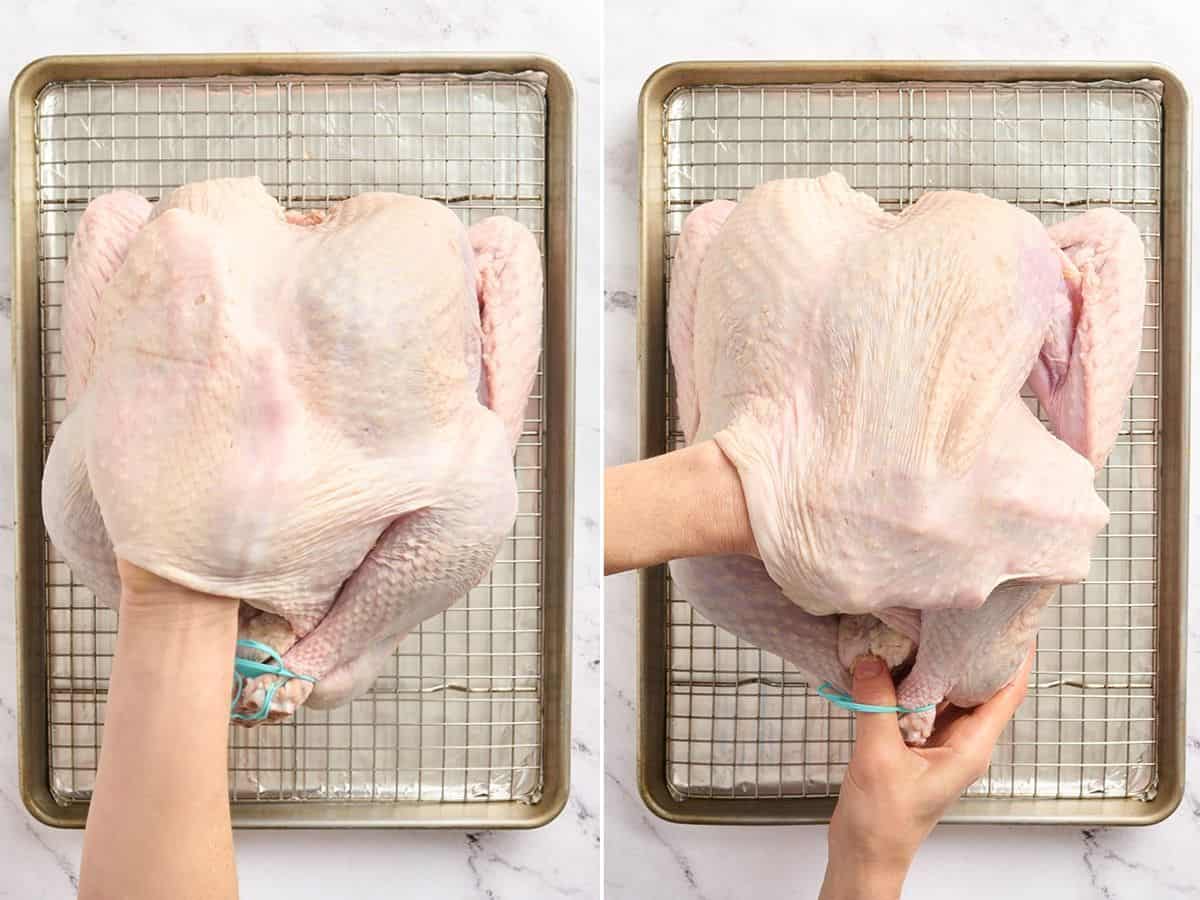
Gently loosen the skin: Carefully slide your fingers underneath the skin covering the breasts and thighs, separating it from the meat to create pockets. Work slowly so you don’t tear the skin. This creates space for the optional dry brine and the compound butter we’ll add later.
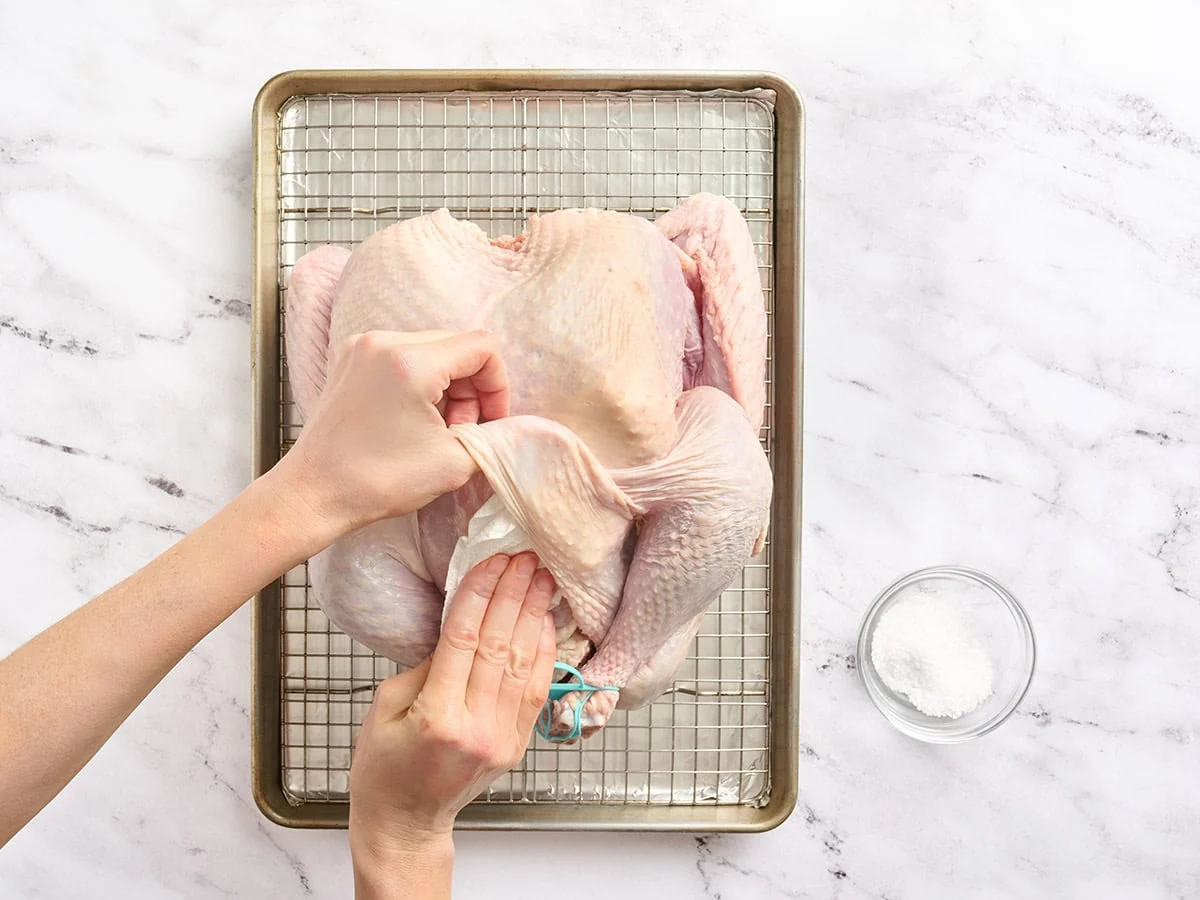
Dry underneath the skin, too: Gently lift the loosened breast skin and use clean paper towels to dab away any moisture between the skin and the meat. The drier you can get the skin, the better it’ll crisp up in the oven.
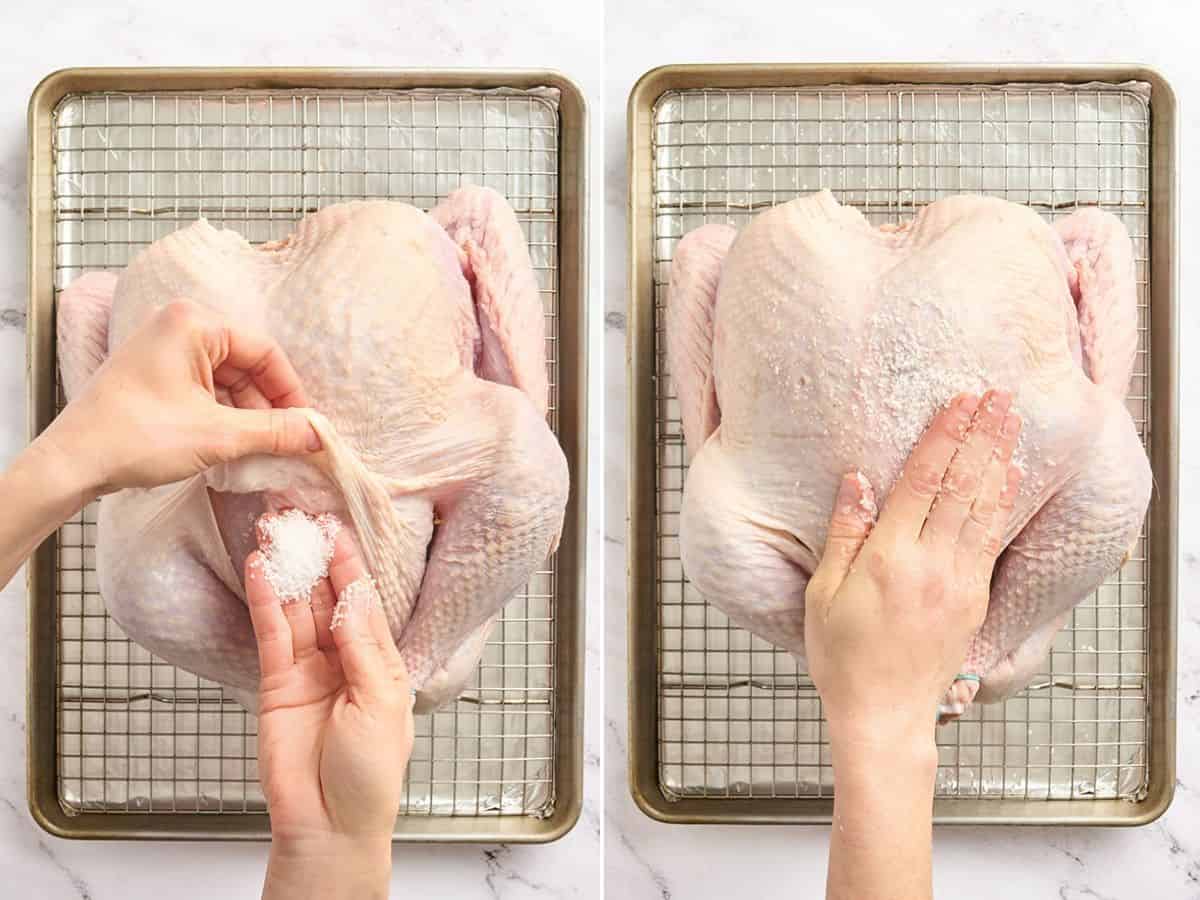
(OPTIONAL) Apply the dry brine: Measure out 1 Tbsp + 1 tsp Morton’s kosher salt. Rub ½ tsp inside the cavity, ½ tsp directly onto the breast meat underneath the skin, and distribute the remaining salt evenly over the exterior skin. Make sure the salt is spread across the turkey rather than concentrated in one area. If you’re skipping the dry brine, go straight to making the compound butter.
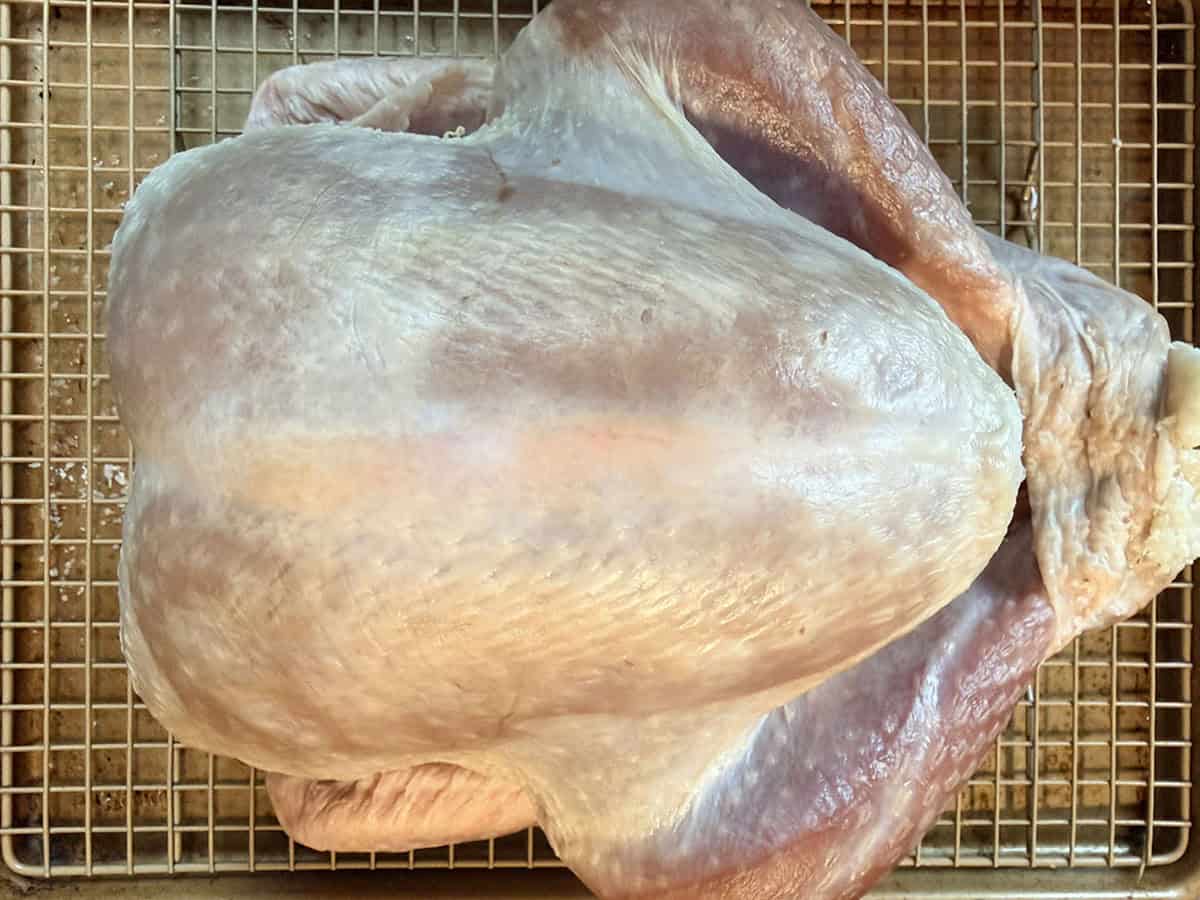
Refrigerate uncovered for 12-24 hours (optional): Pull the skin back over the breast meat and return the turkey to the refrigerator on its wire rack, uncovered. Overnight is ideal! The photo above is my turkey after dry brining for 24 hours. Notice how much drier the skin looks after resting in the fridge? That’s exactly what we’re after. The salt helps season the meat while the uncovered refrigeration draws moisture away from the surface, giving you extra-crispy skin once roasted.
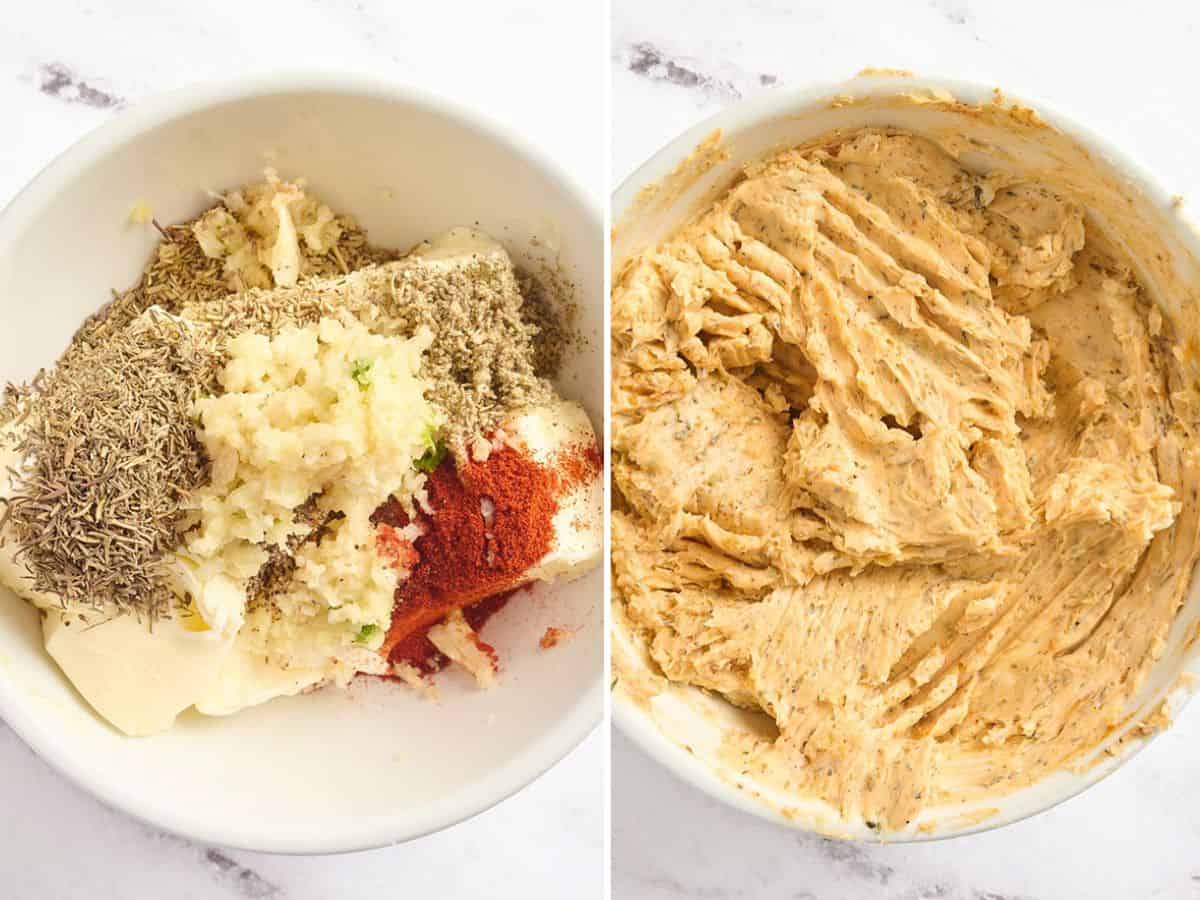
Make the compound butter: In a bowl, combine 2 sticks (1 cup) softened unsalted butter, 4 pressed or finely minced garlic cloves (about 1 Tbsp), ½ tsp ground black pepper, 1½ tsp dried rosemary, 1 tsp dried thyme, ½ tsp rubbed sage, and ½ tsp paprika. Mash everything together with a fork until mostly smooth, and the herbs and seasonings are distributed throughout the butter.
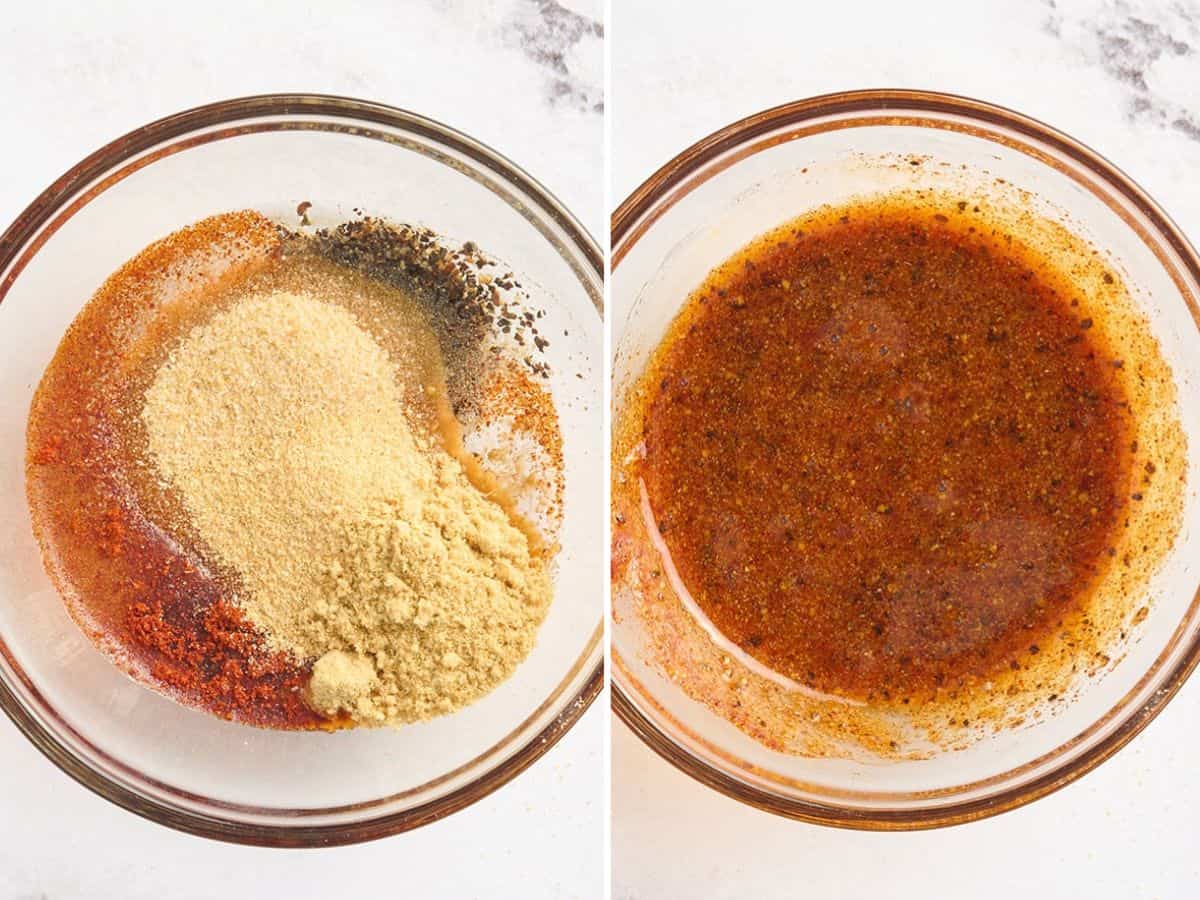
Mix the seasoning oil: In a small cup or bowl, stir together 1½ Tbsp canola oil, ½ tsp ground black pepper, 1 tsp garlic powder, 1 tsp onion powder, ½ tsp paprika, and ¼ tsp ground mustard. Stir until the spices are evenly mixed into the oil to create a thin, speckled seasoning paste.
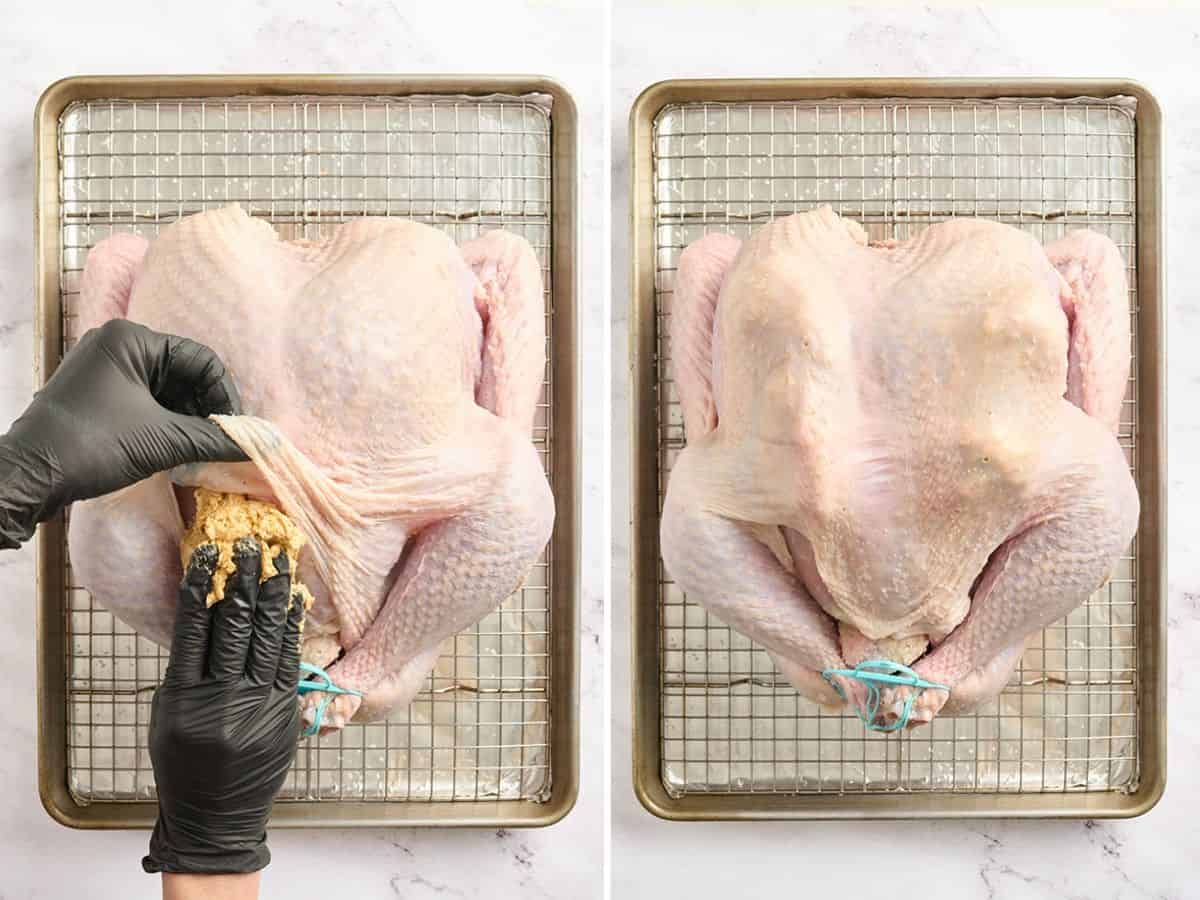
Add the butter underneath the breast skin: Take your turkey out of the refrigerator 30 minutes before roasting to take the chill off. Divide the compound butter into two equal portions, one for each side of the turkey. Gently push the softened butter deep underneath the loosened breast skin, directly onto the meat, working some of each portion toward the thighs.
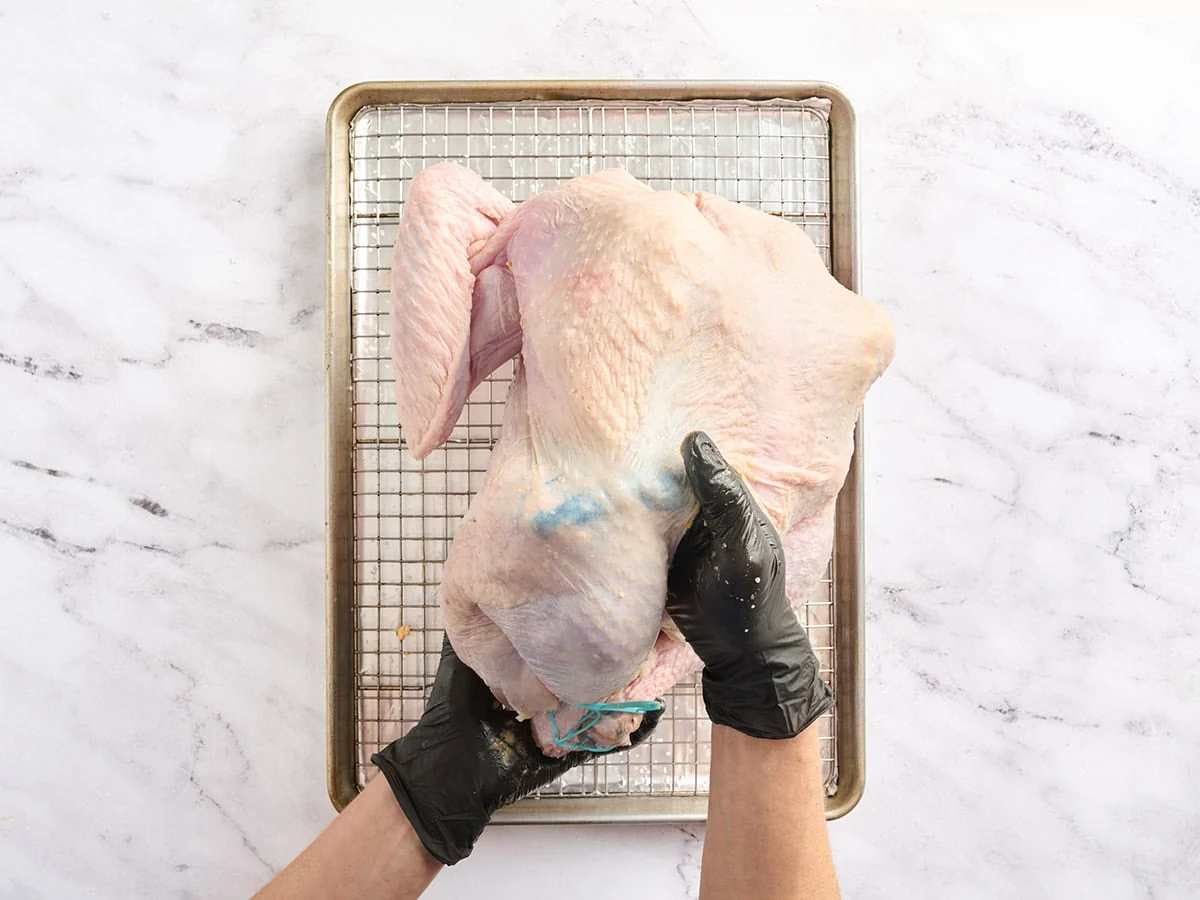
Work the butter underneath the thigh skin: Continue distributing the compound butter into the pockets underneath the thigh skin on both sides. This helps season the dark meat as well as the breast, so you’re not keeping all that delicious garlicky, herbaceous flavor in one area.
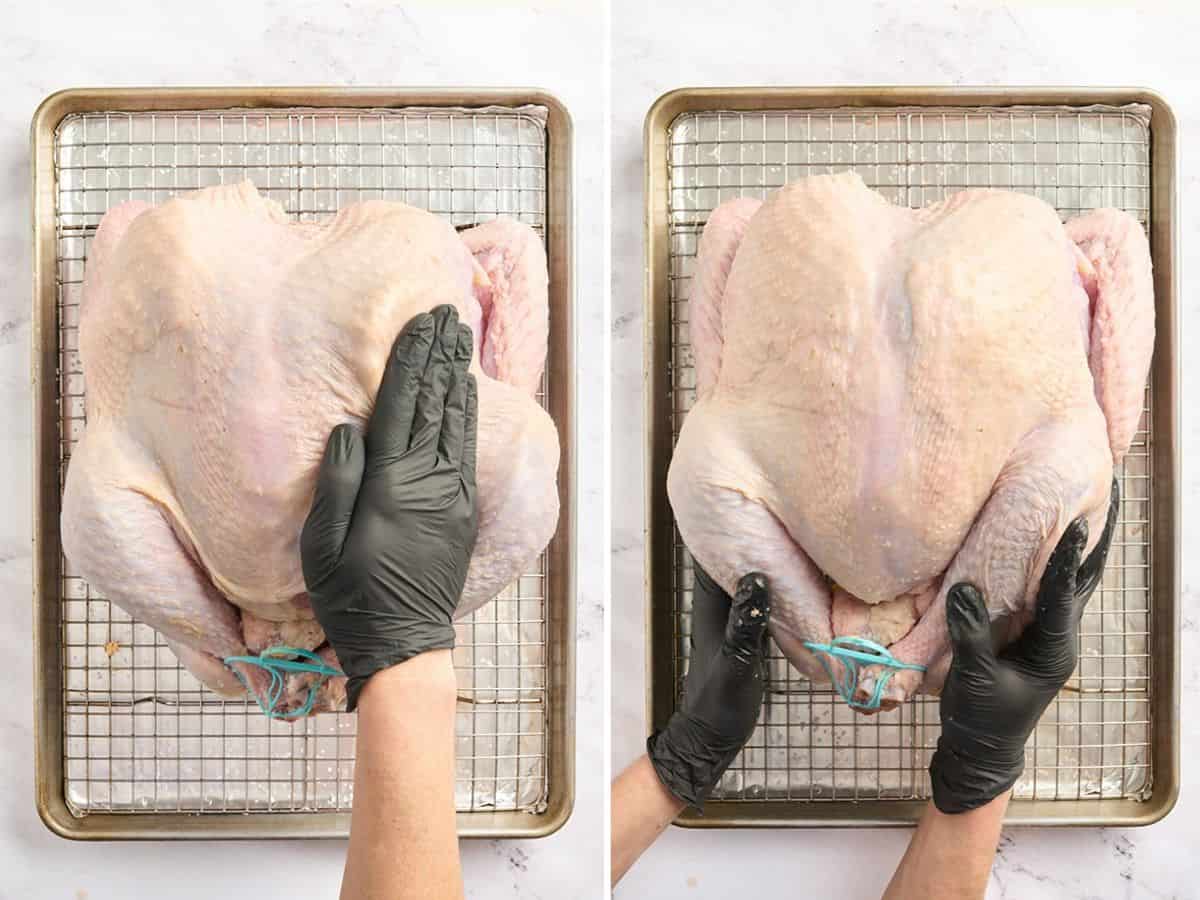
Massage the butter into place. With clean, dry hands (or you can wear gloves, if preferred), gently massage the turkey from the outside, pressing through the skin to distribute the butter underneath. Aim for an even coating across the breast and thigh meat without tearing the skin.
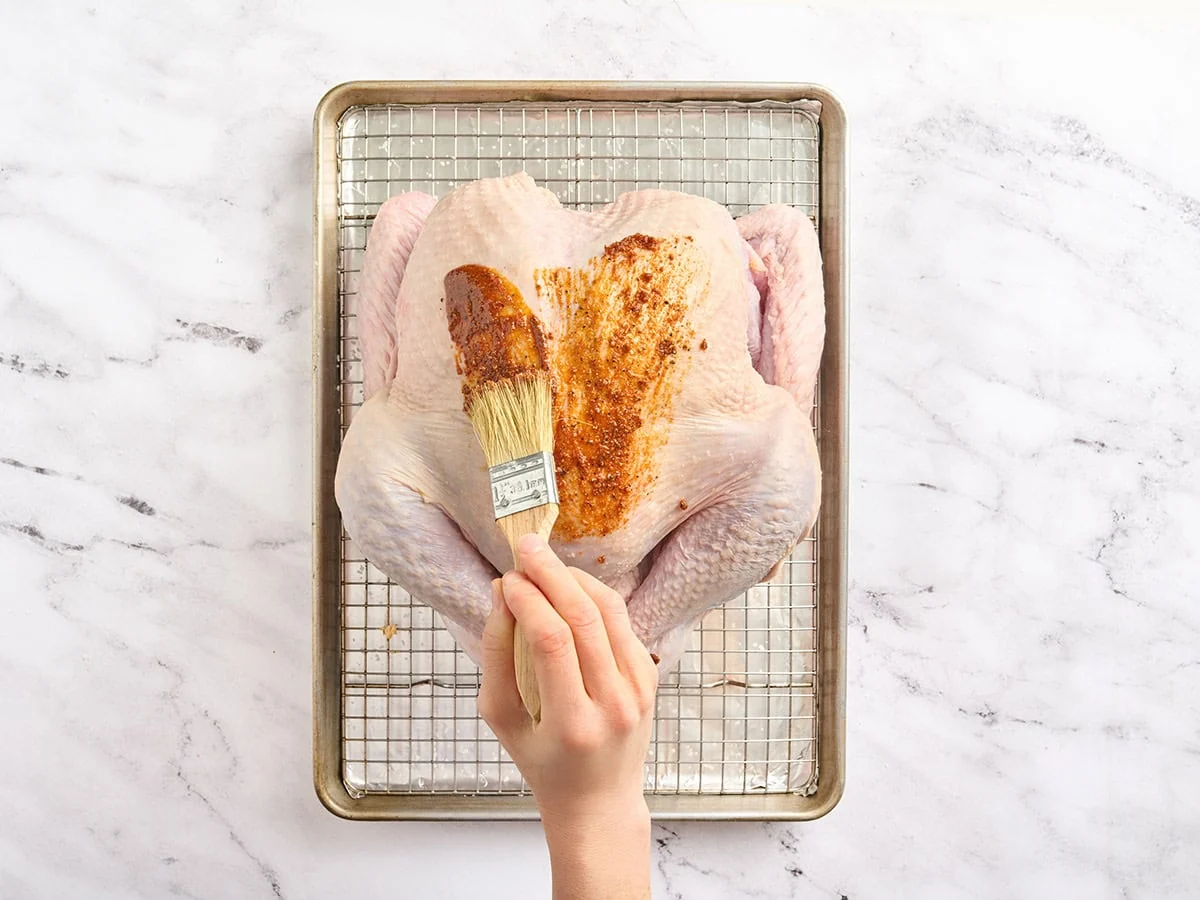
Brush with the seasoning oil: Using a pastry brush, apply a micro-thin sheen of the seasoning oil mixture all over the turkey’s exterior, including the drumsticks and wings. Dab gently over the buttered areas rather than brushing aggressively so you don’t displace the butter underneath the skin. You want a thin, even coating, not a thick layer of oil.
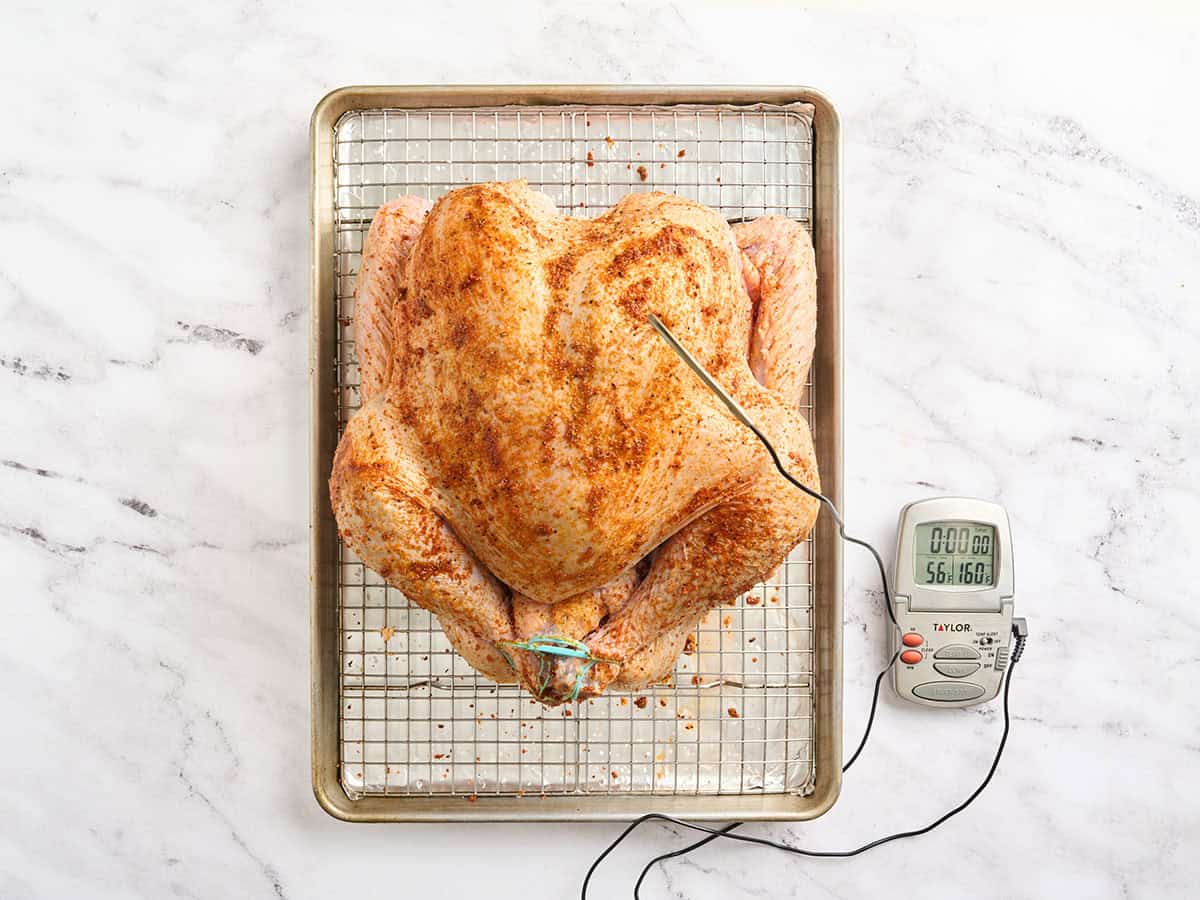
Insert your thermometer and roast: Preheat your oven to 350°F. Insert an electronic probe thermometer into the thickest part of the breast facing the oven door, keeping the probe away from the bone. Positioning it this way keeps the cable close to the door and the temperature display conveniently on your countertop. Roast the unstuffed turkey at 350°F for roughly 2-2½ hours on a baking sheet with a wire rack, or 2½-3 hours in a high-sided roasting pan.
Remove the turkey when the thickest part of the breast reads 157-160°F. The temperature will continue rising during the resting period. I highly recommend using a probe thermometer rather than relying on cooking time alone!
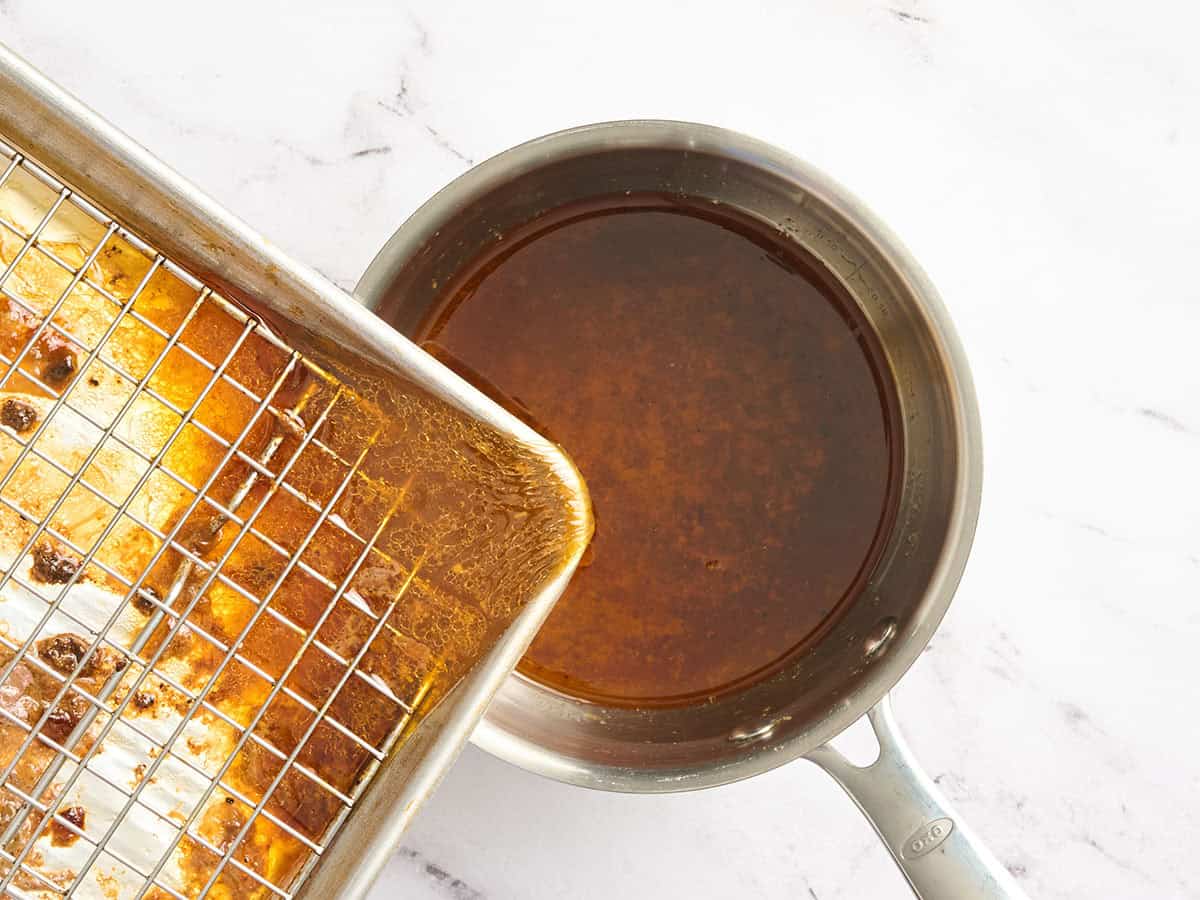
Save those pan juices for gravy: Once roasted, don’t throw away all those flavorful juices left in the roasting pan. Carefully collect them after removing the turkey from the oven and save them for homemade gravy. Follow our turkey gravy recipe to turn those drippings into a rich, savory gravy to serve alongside your Thanksgiving dinner.
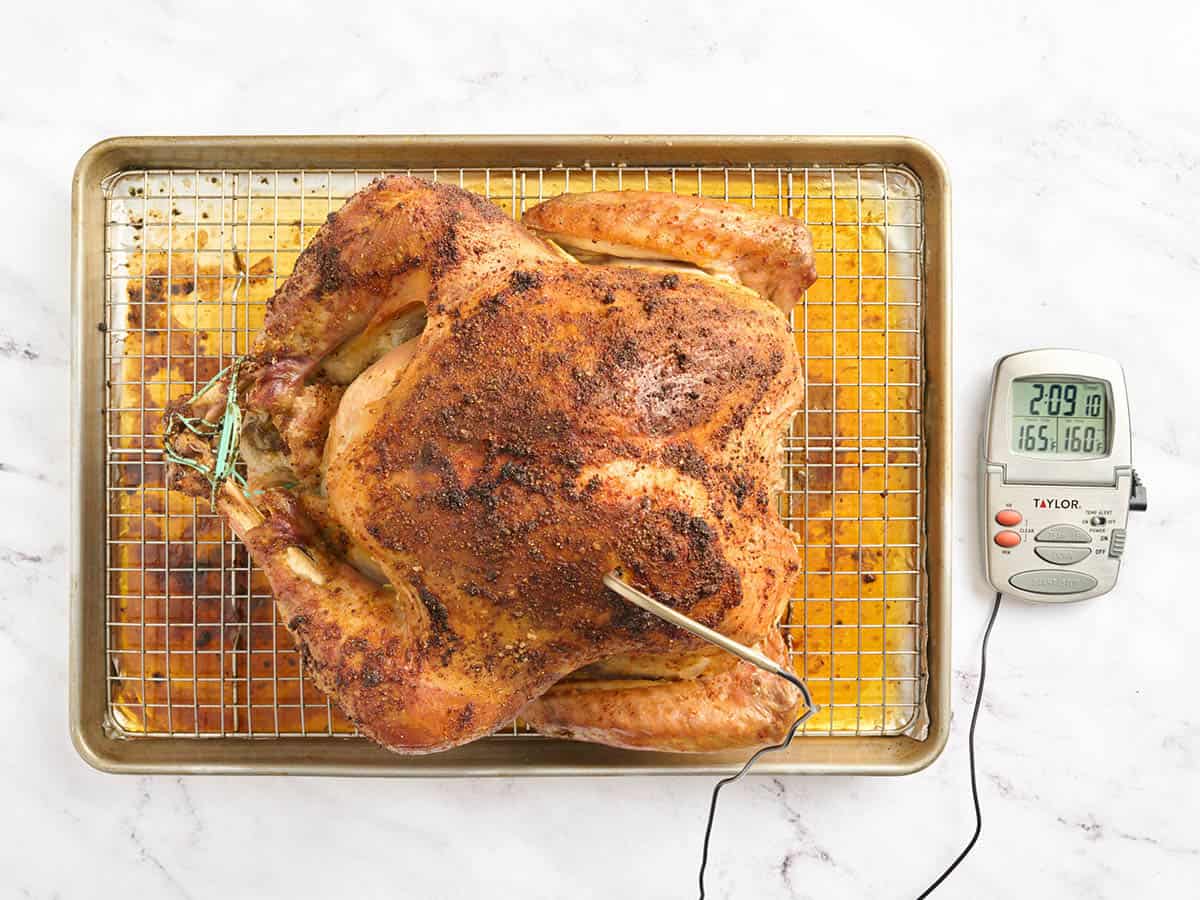
Rest and check the temperature: Let your turkey rest uncovered for 30-45 minutes before carving. During this time, carryover heat continues cooking the turkey and the juices settle back into the meat. Before serving, use an instant-read thermometer to double-check three places: the thickest part of the breast, the innermost part of the thigh, and the innermost part of the wing. All three must reach at least 165°F, without the thermometer touching bone. Once your turkey has reached a safe temperature and finished resting, it’s ready to serve…
Now Carve Your Roasted Turkey
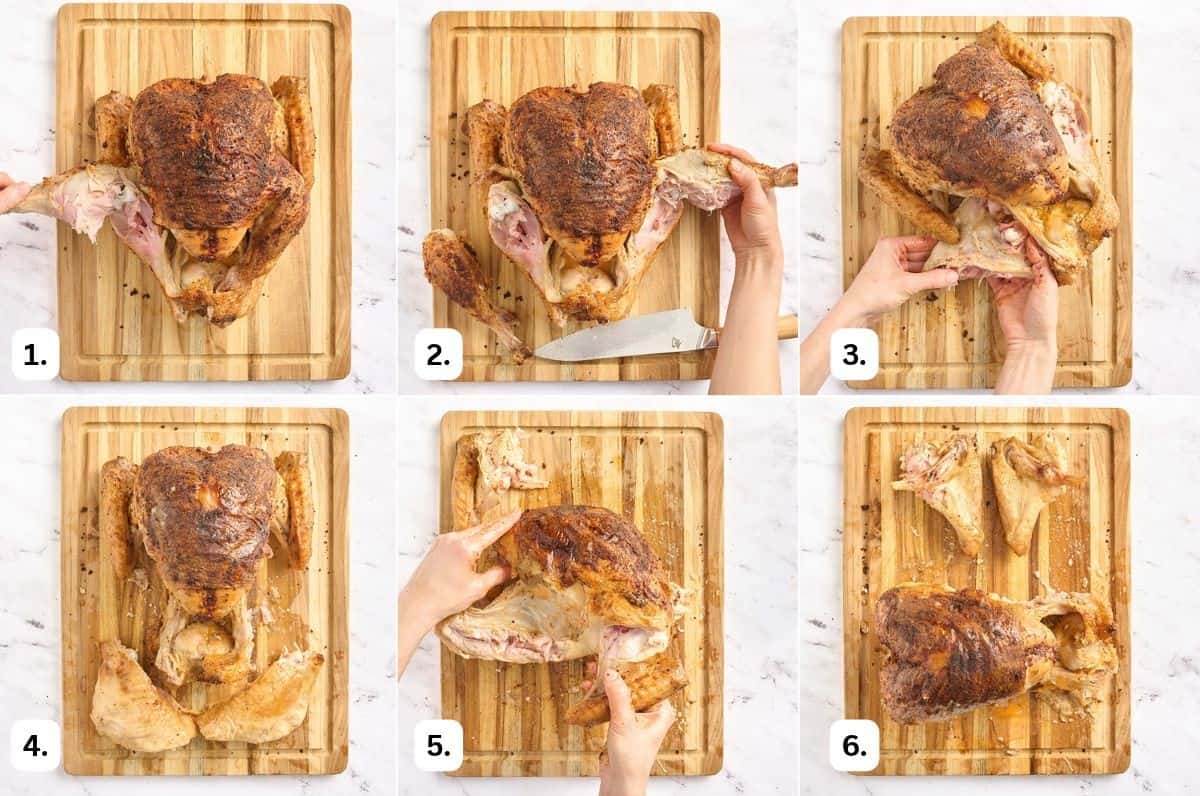
- Remove the drumsticks. Bend each drumstick away from the body and gently separate it, one at a time. (Photos 1 and 2)
- Separate the thighs. Pop the hip joints, then carefully use a knife to separate both thighs from the body. (Photos 3 and 4)
- Remove the wings. Pull away both wings, using a knife to separate them at the joints. You can also cut them into drumettes if you prefer. (Photos 5 and 6)
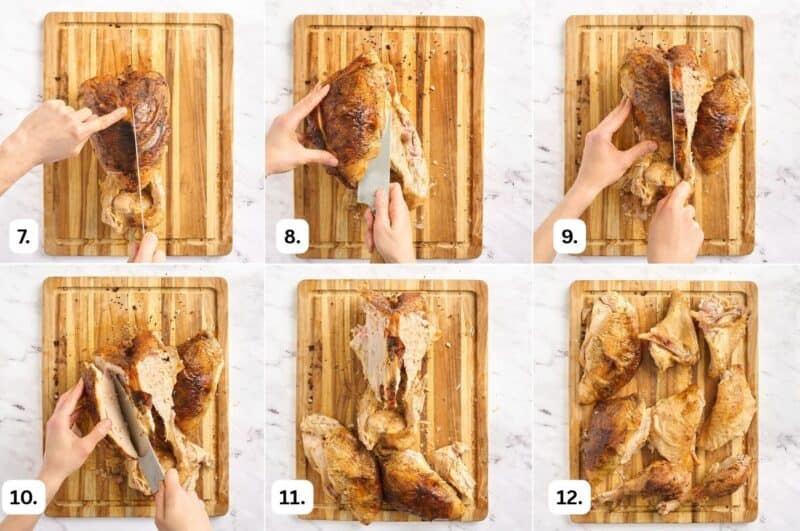
- Carve the first breast. Find the breastbone and make your first cut about 1 cm to one side. Follow the curve of the ribs as you gently pull the breast away. (Photos 7 and 8)
- Repeat on the other side. Cut along the other side of the breastbone, then follow the rib cage and cut underneath where the wing was attached to free the second breast. (Photos 9, 10, and 11)
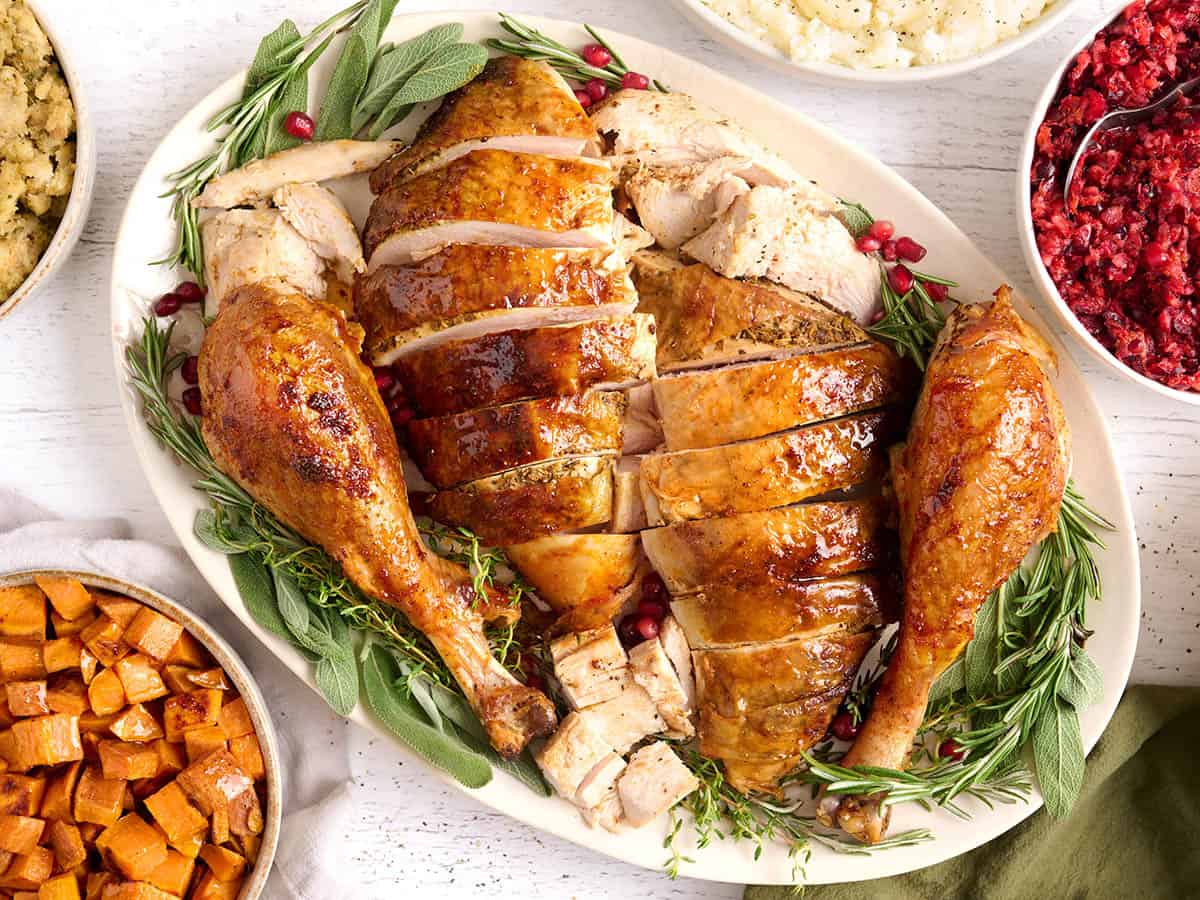
- Arrange the turkey for serving. Set both breasts on a platter with the drumsticks, thighs, and wings. Slice the breast meat just before serving. Enjoy! (Photo 12 and photo below)
Don’t Waste a Thing!
I use a whole turkey for this recipe and remove the neck and giblets before roasting. You can discard them if you like, or put them to work while the turkey’s in the oven:
- Use the giblets for gravy: Unwrap the giblets and put the neck, heart, and gizzard in a saucepan with 1 chopped onion, 1 carrot, and 1 celery rib. Add enough water to cover and simmer for 45 mins-1 hour. Leave out the liver for a milder broth. Strain and use the broth in place of the chicken broth to make your turkey gravy.
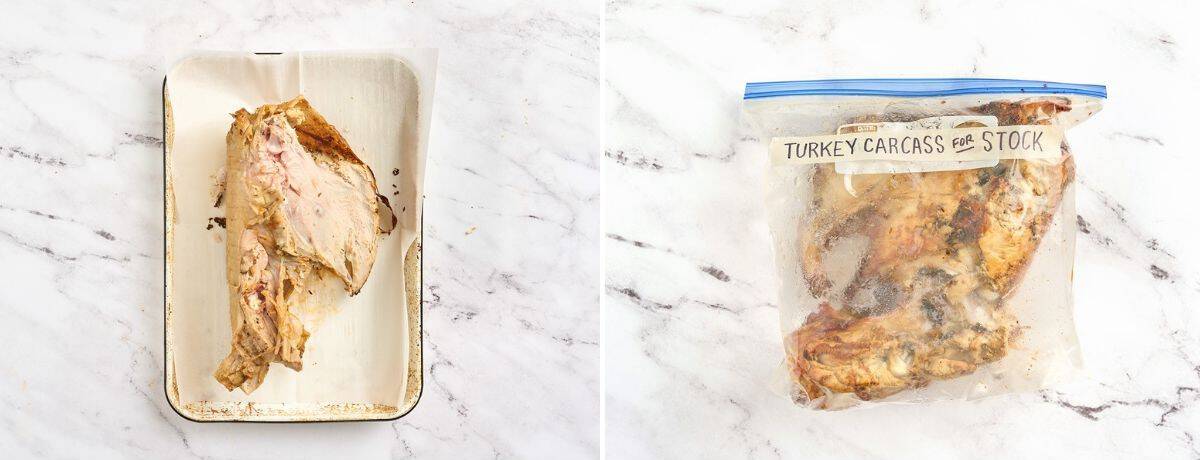
- Save the carcass for stock: For a deeper roasted flavor, lightly oil the bones and roast them on a rimmed baking sheet at 450°F for about 30 mins, until well browned. Check them early if they’re already quite dark. Chill the roasted bones, then pack them in a freezer bag and freeze for later (up to 3 months). If you skip the optional extra roast, refrigerate or freeze the bones within 2 hours of cooking. Thaw frozen bones in the fridge when you’re ready to make stock.
- Make the stock on the stove or in a slow cooker: Add the turkey carcass, 1 large onion, 2 carrots, 3 celery ribs, and 1-2 bay leaves if you have them to a soup pot or crockpot. Roughly chop the vegetables and add enough water to just cover everything. Simmer gently on the stove for 2-3 hours, or cook on High for at least 6 hours using the method in our slow cooker chicken broth guide. Strain the stock and use it for soups or gravy.
Roasted Turkey FAQ’s
If a question comes up halfway through prep, you can jump straight to the answer here:
My Turkey is still frozen! Help!
Don’t panic! Do the cold-water emergency thaw. Keep the turkey in its original leak-proof wrapper and submerge it breast-side down in a clean sink or tub filled completely with cold tap water. Swap the water out every 30 minutes so it stays safe and ice-cold. It takes about 30 minutes per pound, so a 12-14 lb bird will take 6 to 7 hours to thaw completely. If it’s just icy inside the cavity, run cold tap water through the center to break up internal ice chunks, then dab every inch bone-dry before seasoning!
(And hey, if you’re realizing this the night before Thanksgiving, set your alarm. For a 4:00 PM dinner, you’ll need to kick off that cold-water bath by 4:00 or 5:00 AM sharp to give it those 6-7 hours!)
My turkey is starting to look too dark on top; what can I do?
Tent it loosely with a sheet of aluminum foil! If the top of the breast or the tips of the drumsticks are getting deeply browned before the center reaches temp, shield them with a piece of foil folded into a light dome over the bird. This deflects direct heat while allowing the oven’s ambient heat to finish cooking the inside.
Should I trust the pop-up turkey button to tell me when it’s done?
No! Toss it out and use an instant-read meat thermometer! Those little plastic pop-up timers are notoriously unreliable. They operate on a meltable metal alloy set to trip at around 180°F, meaning by the time it pops, your breast meat is already overcooked, dry, and chalky. Instead, insert a digital thermometer into the thickest part of the breast (without touching bone) and pull the bird at 157°F-160°F. Carryover heat will bring it up to a safe 165°F while resting.
Standard USDA roasting charts recommend 3-3 ¾ hours at 325°F for an unstuffed 12-14 lb turkey in a traditional high-sided roasting pan. They outline why you should never roast a turkey at a temperature below 325°F here. (Hello, Danger Zone!)
At 350°F (as I use in this recipe), standard estimates are 2-2 ½ hours for a sheet pan with a wire rack, or 2 ½–3 hours if using a high-sided roasting pan. If you are cooking your bird in a roasting pan with high sides, start checking your bird at the 2½ hour mark. I can’t stress enough how much of a difference having an electronic probe thermometer inserted into the breast meat while the turkey is in the oven will help ensure your bird comes out PERFECT.
Why 2-2 ½ hours worked for us
- Baking Sheet with Wire Rack: Cooking on a flat baking sheet with a wire rack allows hot air to circulate freely around the entire bird, cooking it significantly faster than a traditional high-walled roasting pan that traps steam and shields the sides.
- Dry Brining & Air-Chilling: Drying out the skin and outer layer of meat speeds up heat transfer and skin crisping.
- Targeting 157°F-160°F: Pulling the bird at 157°F-160°F (rather than waiting for 165°F in the oven) reduces total oven time by 15-25 minutes, relying on carryover cooking during the rest. This results in a super juicy, perfectly cooked turkey.
Do I have to brine my turkey?
No, you don’t have to, but it makes a massive difference. Just leave out Steps 4 and 5 if you decide not to. Skipping the brine won’t ruin your dinner, especially since you’re using our rich compound butter under the skin. But taking the time to salt the bird beforehand seasons the meat all the way to the bone and gives you that extra layer of flavor and moisture.
Wet Brine vs. Dry Brine: What’s the Difference?
- Dry Brine: Gives you concentrated, deep turkey flavor, incredibly juicy meat, and shatteringly crisp, golden skin because the fridge air dehydrates the surface. It’s low-effort and takes up minimal fridge space.
- Wet Brine: Plumps the meat up with extra water weight which does help it cook up juicy, but leaves the skin wet, rubbery, and soggy (making it really hard to get a good crisp). It also requires a giant bucket, gallons of water, ice, and a massive chunk of your refrigerator shelf.
Why rest before carving?
Because carving too soon empties all that hard-earned moisture onto your cutting board. During roasting, heat pushes juices into the center of the meat. Letting the bird rest uncovered for 30-45 minutes lets the muscle fibers relax and reabsorb those juices so every slice stays amazingly juicy. Plus, carryover heat gently finishes cooking the center to a safe 165°F without drying out the outer layers.
Storage & Reheating
If you haven’t already, remove the leftover turkey from the bones (see the above carving guidance), slice or chop it into smaller pieces, and refrigerate it in shallow, airtight containers within 2 hours of cooking (or 1 hour if it’s above 90°F). Keep the turkey at 40°F or below and use it within 3-4 days. Store any leftover gravy and sides separately.
Reheating
I’d warm only what you plan to serve. Add a splash of broth or water to keep the turkey from drying out, especially the lean breast meat. For several servings, cover the turkey with foil and warm it in a 325°F oven. For a few slices, use a covered skillet over medium heat or a microwave-safe dish with a vented cover. If you microwave it, turn the pieces partway through and let them stand briefly before checking the temperature in a few spots.
Whichever method you use, reheat the turkey to 165°F throughout. The skin will soften in the fridge and stay soft when reheated covered. If you want to crisp it back up, give the reheated pieces a quick sear skin-side down in a lightly oiled skillet.
Freezing
Freeze sliced or shredded roast turkey in meal-sized portions for up to 3 months for best texture. Press the air out of freezer bags, label them with the date, and freeze them flat so they thaw more evenly in the fridge. The meat can lose a little moisture as it thaws, so the breast may be slightly drier after reheating, and the skin will lose its crunch. A splash of broth helps when reheating, or you can use the thawed meat in soup or pot pie.
Thanksgiving Eve to Thanksgiving Day Schedule (For a 4:00 PM Dinner)
Here’s a play-by-play schedule to help you get your bird ready for the big day with minimal stress. Download it here, print it out, and stick it on your fridge so you know what to do and when.
Monday
Make sure your bird goes into the fridge by Sunday or Monday morning so it is 100% thawed by Wednesday morning!
If you are planning to do a 12-24 hour dry brine, make sure it’s fully thawed on Wednesday. (Still frozen the night before Thanksgiving? Refer to our emergency cold-water thaw guide above and make sure you start by 4:00 AM! Set your alarm!).
Wednesday (The Day Before Thanksgiving – Morning/Early Afternoon):
- Prep: Unwrap the turkey, remove the neck and giblets, trim any excess neck skin, and pat every single inch dry with clean paper towels.
- Dry Brine & Refrigerate (optional): Apply your kosher salt (a little inside, a little under the breast skin, and all over the exterior, see recipe for amounts). Place the bird on a wire rack set inside a rimmed sheet pan and put it uncovered on the bottom shelf of the fridge overnight. If you’re skipping the dry brine, leave the turkey wrapped in the fridge and do the prep on Thursday.
Thursday (Thanksgiving Day): 10:45 AM (5.25 Hours Before 4pm Dinner):
Take the turkey out of the fridge and let it sit at room temperature for at least 30 minutes to take off the chill. (Not to exceed 2 hours at room temperature! Perishable raw poultry should never sit in the temperature “Danger Zone”, 40°F to 140°F, for more than 2 total hours, as surface bacteria can multiply rapidly.)
Mix your room-temperature compound butter and your exterior seasoning oils. Set aside.
11:15 AM (4.75 Hours Before Dinner):
Preheat your oven to 350°F. Slide the compound butter under the skin of the breasts and thighs. Brush a micro-thin sheen of the seasoning oil over the outside.
11:45 AM (4.25 Hours Before Dinner):
Place the turkey on a rack in your roasting pan or sheet pan and slide it into the oven.
2:15 PM (1.75 Hours Before Dinner – Check Temp):
Check the internal temperature with your probe thermometer or digital instant-read. For a 13-14 lb bird, it should be getting close! Crucial rule: Pull the bird the moment the thickest part of the breast hits 157°F-160°F (the thighs will be around 175°F). If the top is getting too dark before the temp is reached, loosely tent a piece of foil over the breast (but not tightly touching the breast or the skin may tear when you remove the foil!)
2:45 PM (Target Pull Time):
Transfer the turkey from the oven to your cutting board once the breast hits 157°F-160°F.
2:45 PM – 3:30 PM (The Rest):
Let it rest uncovered on the counter for 30-45 minutes so the juices settle and the internal temperature rises safely to 165°F.
3:30 PM – 4:00 PM (Final Check & Carving): Use your instant-read thermometer to double-check that all three key spots (breast, thigh, and wing) have reached at least 165°F.
4:00 PM: Carve and serve your perfectly juicy, crispy-skinned turkey!
More Ways to Use Leftover Turkey
- If I’m feeding a crowd again the next day, I’d make a tray of Turkey Sliders with cranberry sauce, melty Swiss, and buttery Hawaiian rolls.
- Give leftovers a completely different flavor with our three-bean Turkey Chili. Sauté the vegetables first, then stir in shredded roast turkey near the end of simmering in place of the ground turkey and heat it through to 165°F.
- When there’s a little bit of everything left, tuck the turkey, stuffing, and mashed potatoes into crescent dough for a golden Holiday Leftovers Wreath.
- For a quick lunch for one, crisp up a Thanksgiving Leftovers Tortilla Wrap filled with turkey, stuffing, cranberry sauce, and melty brie.